
D5 Step-by-Step Instruction
![]()
Below is the collection process for the Clothing Collection Kit.
When using the D5 Clothing Collection Kit, you will need to follow the below process:
PROCESS 1 : PROCESS 2 : PROCESS 3
If you are making use of any of the other kits during the collection process, ensure that you have all the required kits with you before you start. All selected kits should be used during the same collection period.
NOTE: Only ONE kit must be open at a given time. Open one kit, do the collection, including the kit’s documentation and seal the completed evidence sealing bags. Only now may you open the second kit.

PRINCIPLES AND HOW TO USE THIS KIT
When collecting samples for forensic DNA analysis, the following principles should be strictly adhered to:
- Avoid contamination. Ensure that evidence is not contaminated by other materials. Wear gloves at all times. Change your gloves when necessary. Modern DNA assay systems are very sensitive and may detect small amounts of extraneous material.
- Collect early. Try to collect forensic DNA evidence as soon as possible. The likelihood of collecting evidentiary material decreases with the passing of time. Ideally, evidence should be collected within 24 hours of the crime; after 72 hours, yields are reduced considerably.
- Handle appropriately. Ensure that specimens are packed, stored and transported correctly.
- Package in correct container. All samples must be packaged in the correctly labeled bags in the evidence collection kit.
- Ensure security. Samples should be packed to ensure that they are secure and tamper proof. Collected kits must be sealed with the supplied Tamper-Evident Seal. After sealing it must be placed in the supplied Evidence Sealing Bag. Only authorized people should be entrusted with samples.
- Maintain continuity. Once evidence has been collected, its subsequent handling should be recorded. Details of the transfer of the evidence between individuals should also be recorded.
- Document collection. It is important to complete the Collection of Forensic DNA Evidence from Crime Scene form completely.
- Inform the patient. Be sure to inform you patient what you are doing and why. Explain the collection process as you go along.
A SERIES OF EVIDENCE COLLECTION KITS
Other kits in this Sexual Assault series are listed below:
- D1 Adult Sexual Assault Evidence Collection Kit. (for Genital Samples)
- D2 DNA Evidence From Body Collection Kit. (general body evidence samples)
- D3 Reference Hair Sample Collection kit. (pubic and head hair samples)
- D7 Pediatric Sexual Assault Evidence Collection Kit. (Kit for under 12 year old)
NOTE: VERY IMPORTANT
If you are using two or more of the above kits it is very important to work with one kit at a time from start to finish. Open the kit, perform the collection as required, fill in the documentation, seal all Evidence collection bags and place the bags safely to one side. Change your gloves for new gloves and only then open the next kit.
This procedure applies to any examination where you make use of more than one kit. NO exceptions.
IMPORTANCE OF CLOTHING AS EVIDENCE
Often clothing contains the most important evidence in a case of sexual assault. The reasons are as follows:
- Clothing provides a surface, upon which traces of foreign matter may be found such as the perpetrator’s semen, saliva, blood, hairs and skin cells.
- Drainage of ejaculate from the vaginal or anal cavities may collect on the panties/underwear, especially in the case of a minor. Although bacterial action and breakdown does occur in this environment, it happens at a slower rate than in the body cavities. After 3 – 6 hours, useable semen evidence, if present is more likely to be found on the patient’s undergarment than on vaginal or anal swabs. For a child, undergarments are very important and parents should be encouraged to bring in the child’s underwear (and diapers). If the patient is not wearing any underpants after the assault, it is then necessary to collect pants, shorts, dress, skirt, petticoat or pantyhose, as these items of clothing is worn close to the genital structures.
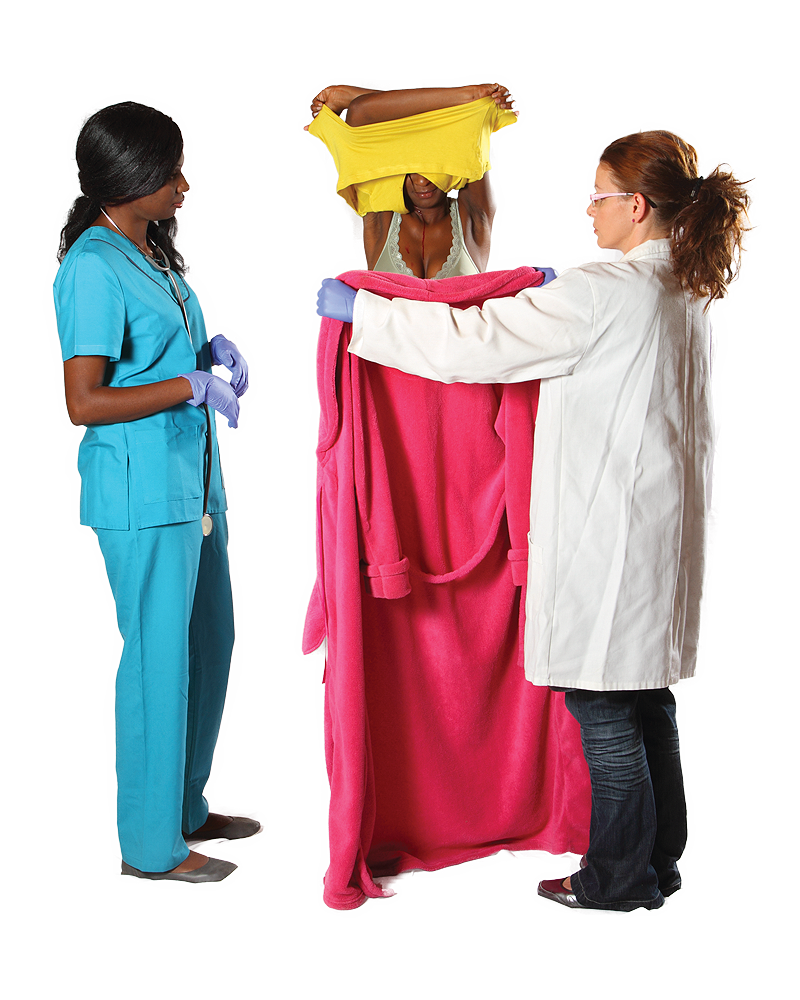
SEQUENCE OF DISROBING
Here we will describe a few scenarios, as your patient may be dressed in a dress, a skirt or pants.
| Scenario 1 | Scenario 2 | Scenario 3 |
| Shoes | Shoes | Shoes |
| Socks | Dress | Jersey |
| Top | Bra | Blouse |
| Pants | Pantyhose | Skirt |
| Bra | Panties | Bra |
| Panties | Panties |
Reminder:
- It is up to you to identify the 3 most likely clothing items to find DNA evidence samples.
- If you feel it is necessary to collect more items, please open a 2nd D5 Clothing Collection Kit.
__________________________________________________________________________________
D5 KIT CONTENT
If this D5 Clothing Collection Kit is being used with other evidence collection kits such as D1; D2 and D3 ensure that all the other collection kits are complete, sealed and packed away.
Before opening the kit


Inspect the kit for any tampering, tears or breaks in the packaging
If tampering or damage is evident do not use this kit and get another one.


- Shake the contents of the bag to the bottom and tear open the bag along the dotted tear line as indicated on the bag. (Do not use a scissors or knife to open the bag.)
- Put on a clean pair of disposable gloves
- Place the contents of the kit onto a smooth clean surface
Identifying the contents of the kit
Content of the bag


- Peel Pouch Step 1 – Large Bag
- Peel Pouch Step 2 – Medium Bag
- Peel Pouch Step 3 – Small Bag
- Documentation Form
- Instruction Flier
Peel Pouch – STEP 1 (sterilized)
This sterilized peel pouch contains everything required to gather an large item of clothing.
Content of Peel Pouch 1


- 1 Large Gusseted Brown Paper Bag
- 1 Long Tamper Evident Seal]
- 1 Evidence Sealing Bag
Peel Pouch – STEP 2 (sterilized)
This sterilized peel pouch contains everything required to gather a medium item of clothing.
Content of Peel Pouch 2

- 1 Medium Gusseted Brown Paper Bag
- 1 Long Tamper Evident Seal
- 1 Evidence Sealing Bag
Peel Pouch – STEP 3 (sterilized)
This sterilized peel pouch contains everything required to gather a small item of clothing.
Content of Peel Pouch 3

- 1 Small Gusseted Brown Paper Bag
- 1 Long Tamper Evident Seal
- 1 Evidence Sealing Bag
Non-sterilized items
Additional items found in the kit are:
Documentation form.

A zip-lock plastic bag that holds 9 desiccant packets (desiccants remove moisture)
Instructional leaflet
Items needed, but not supplied

You will need to supply items such as gloves, pen or anything else to offer a good medical service.
PROCESS 1 – DOCUMENTATION
Collection of Forensic Evidence Form
This form is in triplicate:
Top Copy gets packed into one of the Evidence Sealing Bags.
(DO NOT staple the form to the Evidence Sealing Bag.)
Middle Copy is for your records
Bottom Copy goes to Laws Enforcement Officer

The first section of the form shows the Identifier of the Evidence Sealing Bag. This forms part of the trace ability of evidence and insures that the contents sealed inside the Evidence Sealing Bags can be traced and matched to the information found on the documentation.
The following information should be included on this form:

Evidence Collector
Please complete this section with as much detail as possible.

Collection Information
Please complete this section with as much detail as possible

Individual’s Consent Text
It is very important that you read the Individual’s Consent text out load to your patient. If your patient understands and agrees, ask your patient to sign this section.
Evidence Collected

This section is to record what was collected and which clothing items are being taken. It is recommended that as you collect a clothing item, you immediately write it on this Evidence Collection form as well as on the ” Collected Item” label on the brown paper bag. Here is an example:
- Large Bag Jacket (there seems to be blood on the right sleeve)
- Medium Bag Jeans (Looks like semen stains near the front left pocket)
- Small Bag Panties (there may be semen drainage)
Important :
- At the same time, check that you have recorded your collection on the Label on the Catch Papers and the Evidence Collection Boxes in the area marked: ITEM COLLECTED
End of Collection
PROCESS 2 – COLLECTING SAMPLES

COLLECTING SAMPLES – Biological
STEP 1 – Large Gusseted Brown Paper Bag
Ensure you are wearing a clean pair of gloves
Open the peel pouch STEP 1 and remove the Large Gusseted Brown Paper Bag
As you collect the item of clothing, inspect the item for evidence of interest i.e. blood or semen
You will be collecting large items of clothing such as jeans, shoes or skirt
Ask your patient to remove the item of clothing and collect the item of clothing and place into the Bag.
(Don’t place wet items into the Bag as this will destroy the bag)
The Large bag is for items such as shoes, large jacket, jeans or pants.
You may only place one item into the Large bag, so choose the item with the best chance of evidence.


Or


Without touching your patient, ask her to remove her large clothing items such as shoes, jacket or pants.
Take the items from your patient and inspect them for potential forensic evidence.
Remember, do not place two different items into one bag, (except for shoes)

Fold the top of the Bag over

Seal with a long Tamper Evident Seal

Write what was collected in the space provided on the label on the Brown Paper Bag
Document the collection on the form provided
STEP 2 – Medium Gusseted Brown Paper Bag
Put on a clean pair of gloves before opening the second Peel Pouch
Open the peel pouch STEP 2 and remove the Medium Gusseted Brown Paper Bag
The medium bag is for items such as T-shirt, dress, jersey or a bra.
You may only place one item into the medium bag, so choose the item with the best chance of evidence.


Or


Without touching your patient, ask her to remove her large clothing items such as shoes, jacket or pants.
Take the items from your patient and inspect them for potential forensic evidence.
Remember, do not place two different items into one bag.
(Don’t place wet items into the Bag as this will destroy the bag)
Fold the top of the Bag over

Seal with a long Tamper Evident Seal
Write what was collected in the space provided on the label on the Brown Paper Bag.
Document the collection on the form provided
STEP 3 – Small Gusseted Brown Paper Bag
Put on a clean pair of gloves before opening the second Peel Pouch
Open the peel pouch STEP 3 and remove the Small Gusseted Brown Paper Bag
- The Small bag is for items such as Panties/underpants, pantyhose, socks or bra.
- The panties/underpants are usually the best item to collect into the small bag.
- You may only place one item into the medium bag, so choose the item with the best chance of evidence.
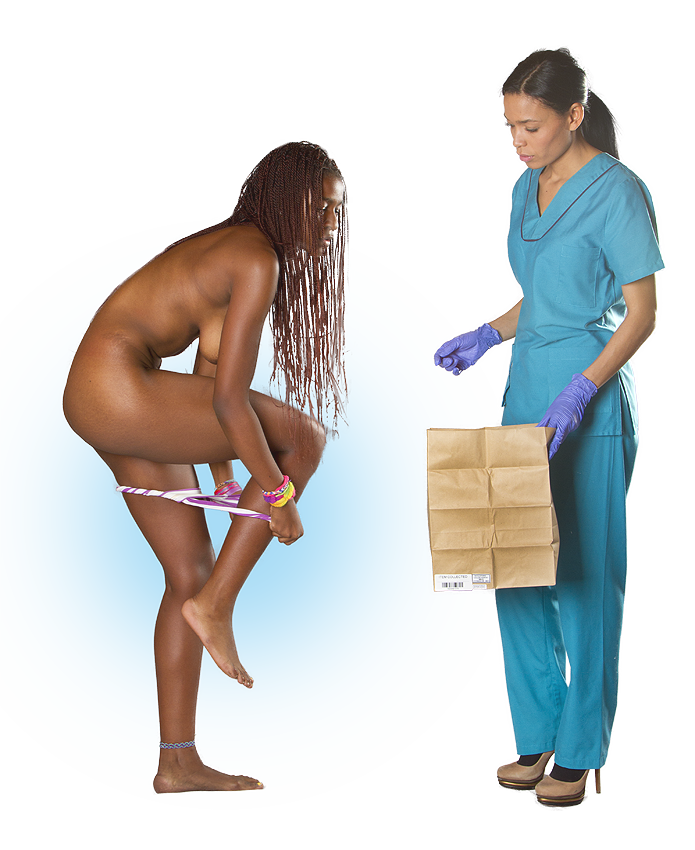

Without touching your patient, ask her to remove her small clothing items such as panties/underpants, socks or bra.
Take the items from your patient and inspect them for potential forensic evidence.
Remember, do not place two different items into one bag, (except for socks).
If a panty-liner or sanitary pad is in place leave it attached to the underwear and collect as a unit
(Don’t place wet items into the Bag as this will destroy the bag)
Fold the top of the Bag over

Seal with a long Tamper Evident Seal
Write what was collected in the space provided on the label on the Brown Paper Bag
Document the collection on the form provided
PROCESS 3 – SEALING THE EVIDENCE FOR COLLECTION
You should now have:

Three Sealed Gusseted Brown Paper Bags
Three Evidence Sealing Bags (large, medium and small)
If this is correct you may place the Gusseted Brown Paper Bags into the corresponding Evidence Sealing Bags as follows:

Large Gusseted Brown Paper Bag is placed into the Large Evidence Sealing Bag
3 loose desiccants packets are placed into the Evidence Sealing Bag (DO NOT SEAL YET)
Medium Gusseted Brown Paper Bag is placed into the Medium Evidence Sealing Bag
3 loose desiccants packets are placed into the Evidence Sealing Bag (DO NOT SEAL YET)

Small Gusseted Brown Paper Bag is placed into the Small Evidence Sealing Bag
3 loose desiccants packets are placed into the Evidence Sealing Bag (DO NOT SEAL YET)

The top copy of the completed and signed Evidence Collection Form is placed into the Large Evidence Sealing Bag.

Seal the Evidence Sealing Bags by peeling away the yellow backing tape. Start peeling the yellow tape from one side while pressing the sticky surface closed. Continue peeling the yellow tape and pressing closed until the bag is sealed. Apply pressure to ensure that the seal is completely sealed.

Complete the information required on the front of the Evidence Sealing Bag.
The kit is now ready to be taken to the Forensic Science Laboratory.
All unused items not contained in the sealed bag may be disposed of into the garbage.
QUESTION and HELP
If you have any questions or have experienced problems with the evidence collection kit, please contact us.
You will be asked to quote the following numbers
- Barcode number – Each kit works with a unique barcode number and can be found on all major items in the kit.
- Lot number –
- The problem experienced – Please supply us with a description of what problems were experienced.
To contact us, please Click Here