
D1 Step-by-Step Instruction

Below is the examination process for a full body evidence collection.
If you are using a D1 Adult Sexual Assault Evidence collection Kit to collect evidence samples from the genital area, follow these processes in the correct order.
PROCESS 1 : PROCESS 2 : PROCESS 3a or b : and PROCESS 4
If you are making use of any of the other kits during the examination process, ensure that you have all the required kits with you before you start. All selected kits should be used during the same examination period.
All pictures of people in this user guide are of consenting models.

Principles and how to use this kit
When collecting samples for forensic DNA analysis, the following principles should be strictly adhered to:
Avoid contamination. Ensure that evidence is not contaminated by other materials. Wear gloves at all times. Change them when necessary. Modern DNA assay systems are very sensitive and may detect small amounts of extraneous material.
Collect early. Try to collect forensic DNA evidence as soon as possible. The likelihood of collecting evidentiary material decreases with the passing of time. Ideally, evidence should be collected within 24 hours of the assault; after 72 hours, yields are reduced considerably.
Handle appropriately. Ensure that specimens are packed, stored and transported correctly.
Package in correct container. All samples must be packaged in the correctly labeled containers in the evidence collection kit.
Ensure security. Samples should be packed to ensure that they are secure and tamper proof. Collected kits must be sealed with the supplied tamper-evident seal. After sealing it must be placed in the supplied evidence sealing bag. Only authorized people should be entrusted with samples.
Maintain continuity. Once evidence has been collected, its subsequent handling should be recorded. Details of the transfer of the evidence between individuals should also be recorded.
Document collection. It is important to complete the Collection of Forensic DNA Evidence from an Adult Patient of Sexual Assault form completely.
HOW TO USE THIS D1 EVIDENCE COLLECTION KIT
Before starting any evidence collection procedure, first attend to any serious medical conditions your patient may have.
Follow any protocol that your facility may have in place on patient treatment before starting with your patient evidence collection.
Please Note: If possible, a urine sample should not be taken from the patient before the sexual assault evidence collection takes place as this may wash away any DNA evidence.
If you are planning on a full body evidence gathering examination, you will require the following kits:
In order of examination sequence
- D3 Reference Hair Samples – For the collection of both scalp hair and pubic hair.
- D5 Clothing Collection Kit – To collect your patients clothing so that the SAPS Forensic Lab can analyze them for additional evidence.
- D2 DNA Evidence Collection from Body Kit – Searching for perpetrators bite marks, blood, saliva and debris from your patient’s body.
- D1 Adult Sexual Assault Evidence Collection Kit – To collect swab samples from the genital area of you patient.
NOTE: VERY IMPORTANT
If you are using two or more of the above kits it is very important to work with one kit at a time from start to finish. Open the kit, perform the collection as required, fill in the documentation, seal all evidence collection bags and place the bags safely to one side. Change your gloves for new gloves and only then open the next kit.
This procedure applies to any examination where you make use of more than one kit. NO exceptions.
Kit Content
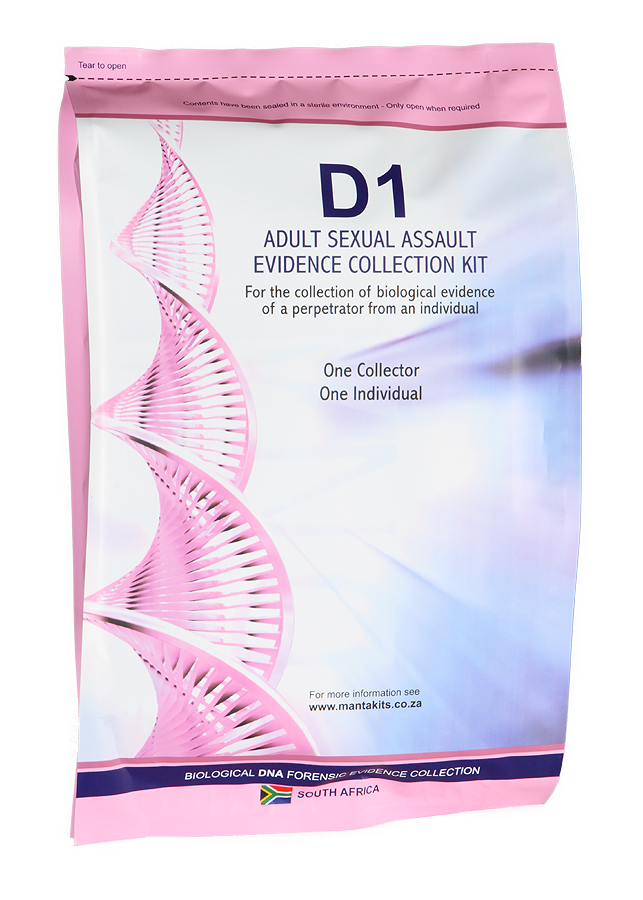
If this D1 Adult Sexual Assault Evidence Collection Kit is being used in an examination with other evidence collection kits such as D2, D3 and/or D5, ensure that all the other collection kits are complete, sealed and packed away.
Opening the kit
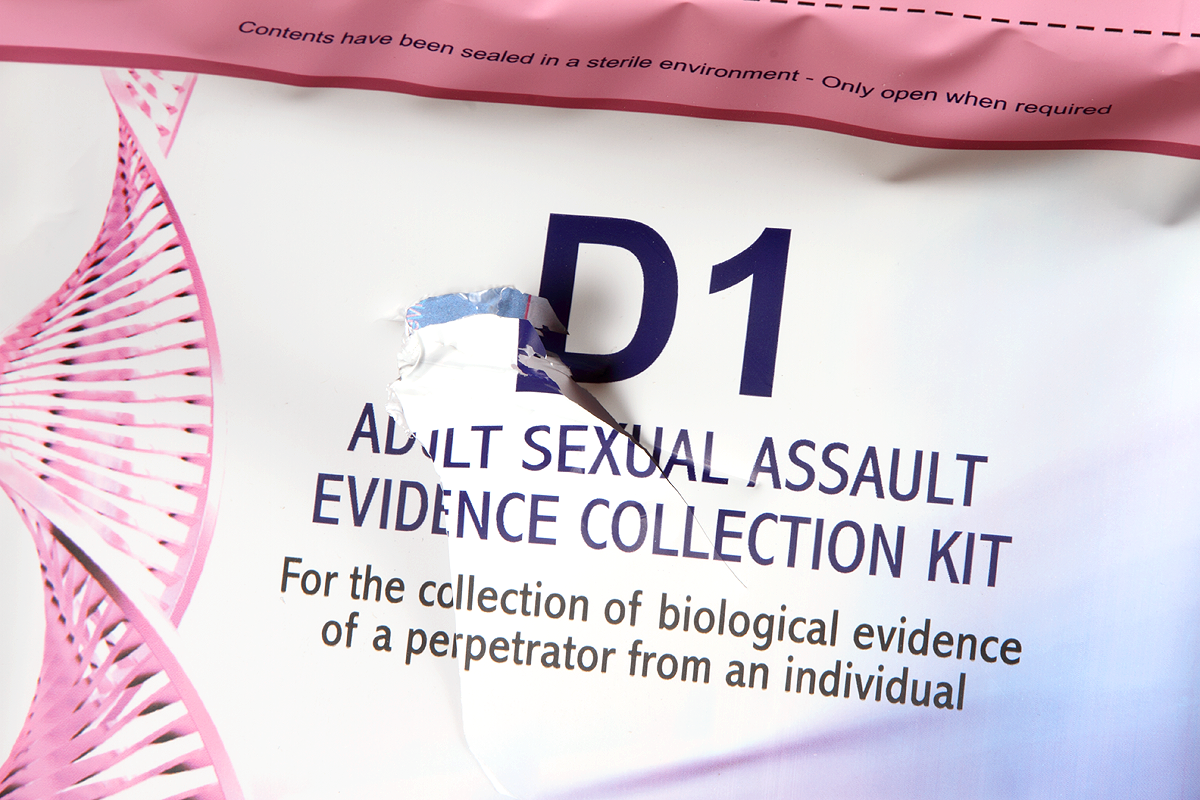
Inspect the kit for any tampering, tears or breaks in the packaging.

If tampering or damage is evident do not use this kit and get another one.
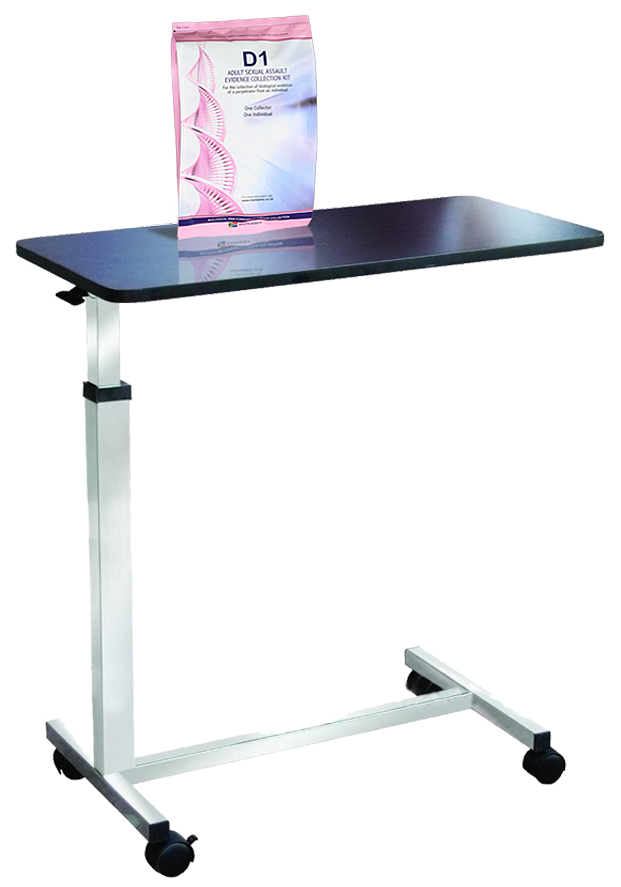
Place the kit on a sturdy clean surface away from the patient.
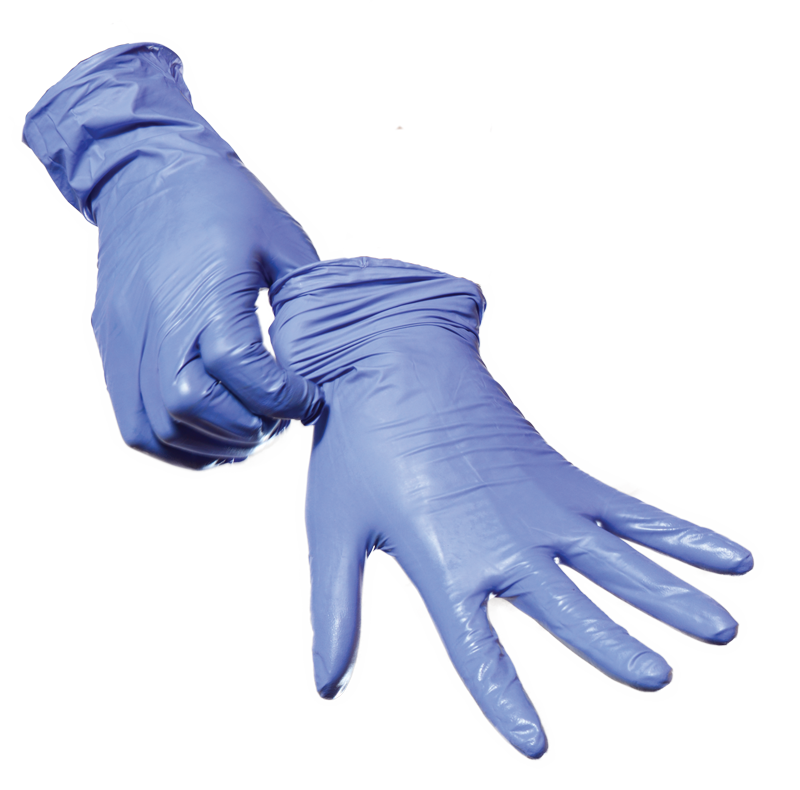
Put on a clean pair of powder free gloves.
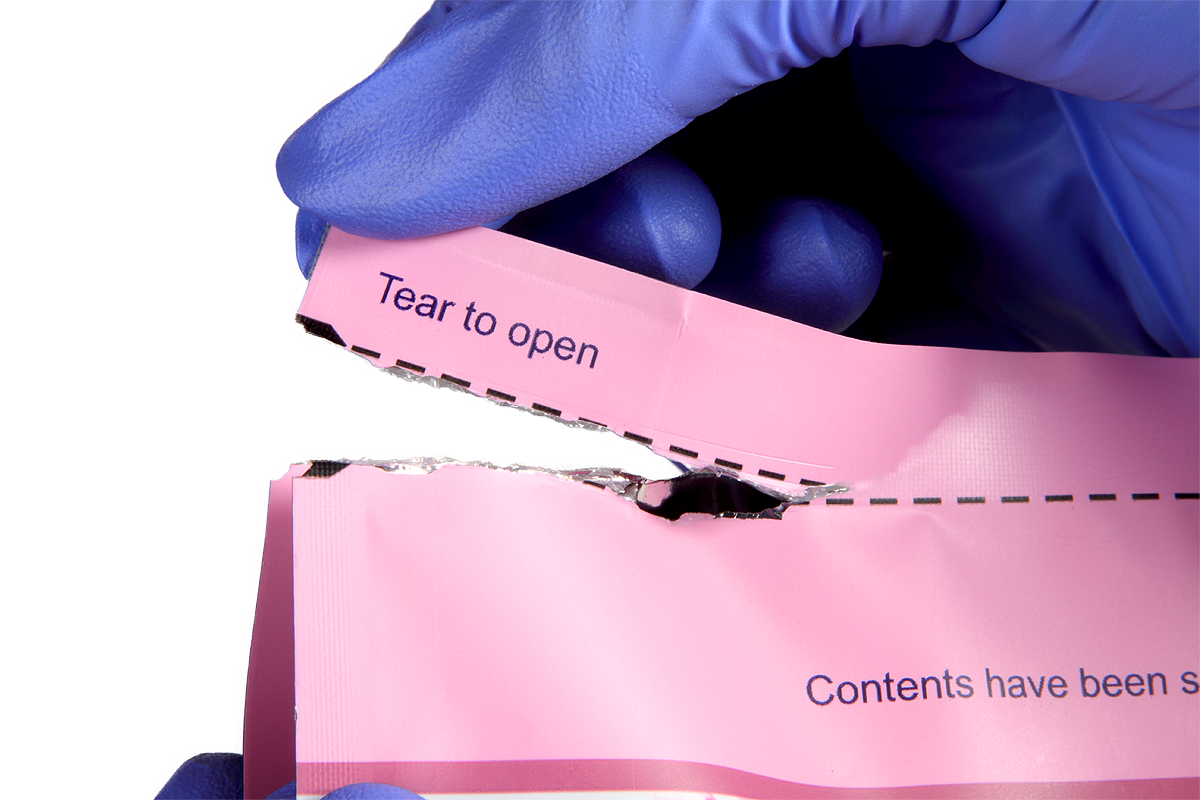
Tear open the bag along the dotted tear line at the top of the bag. Do not use a knife or scissors as this might cut into the contents of the bag.
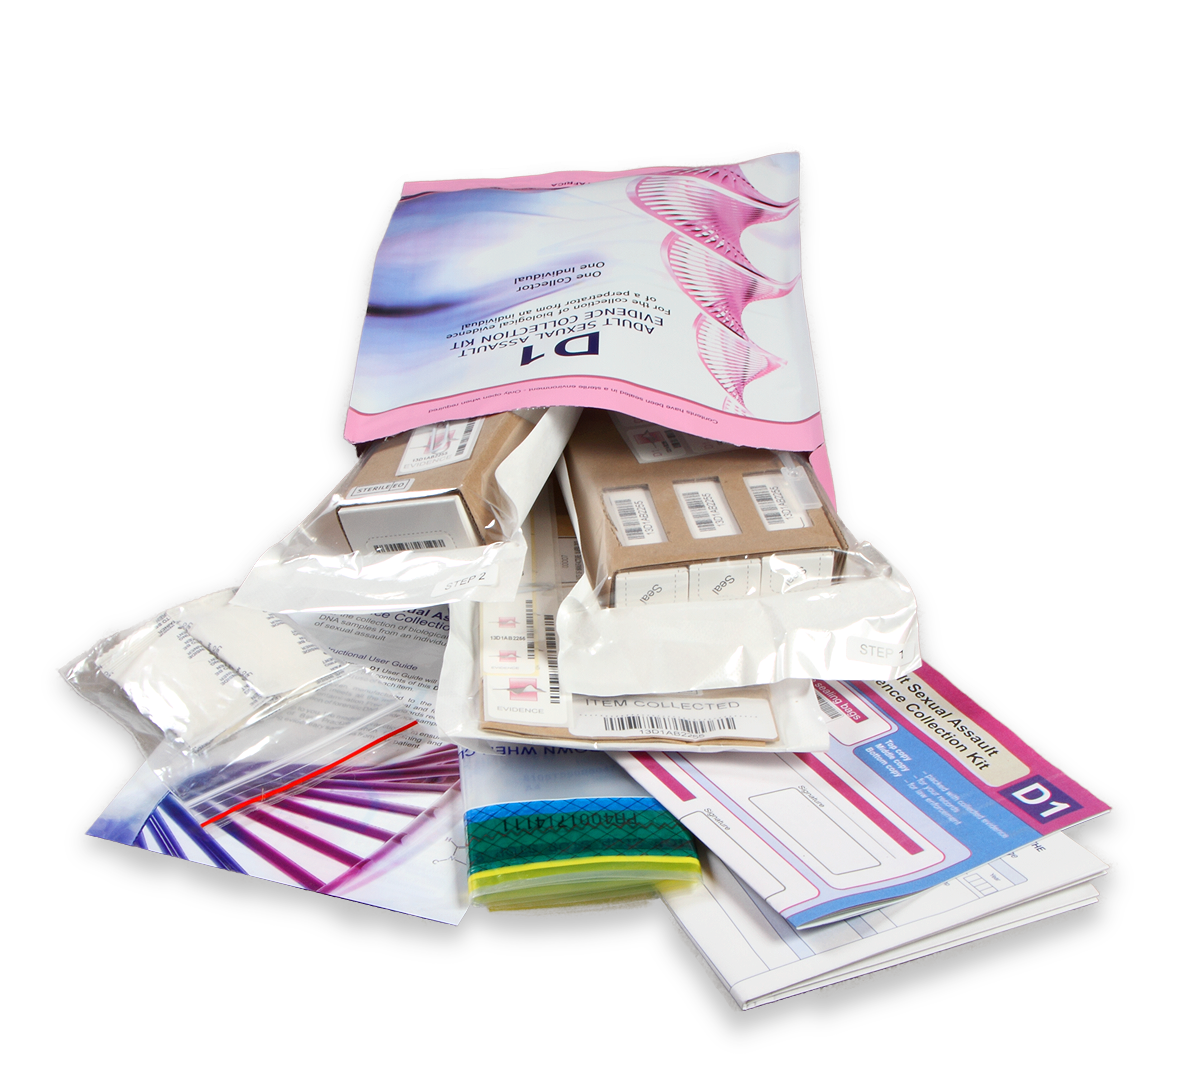
Place the contents of the kit onto a smooth clean surface
Identifying the contents of the kit
Peel Pouch – Labeled STEP 1 (sterilized)
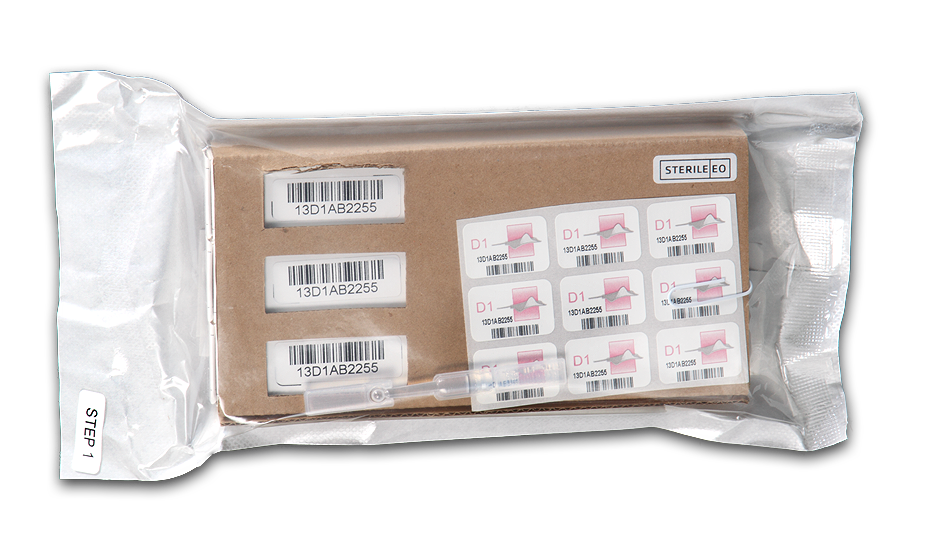
This sterilized peel pouch contains everything required to gather three genital swab samples from your patient.
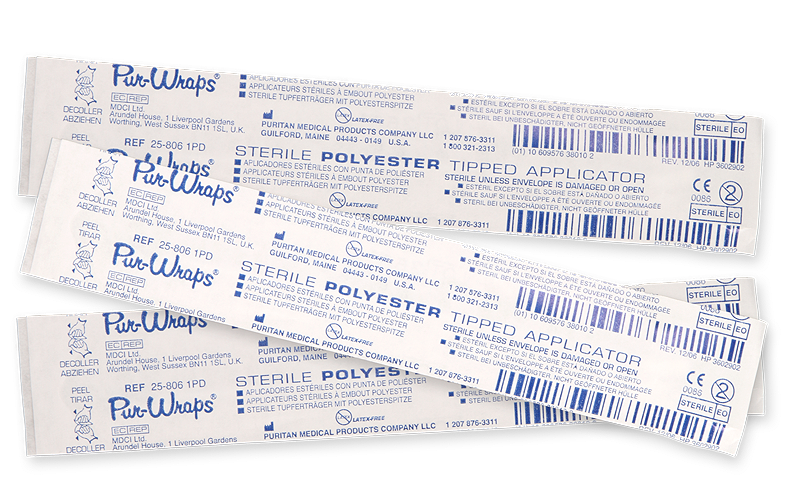
3 Sealed swabs marked, Sterile Polyester Tipped Applicator
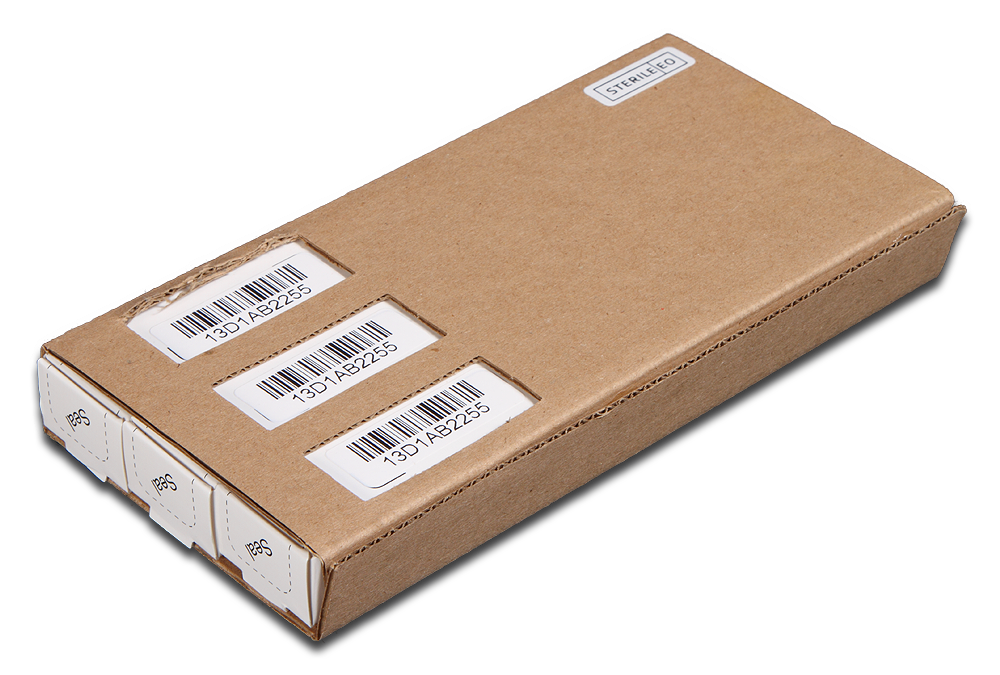
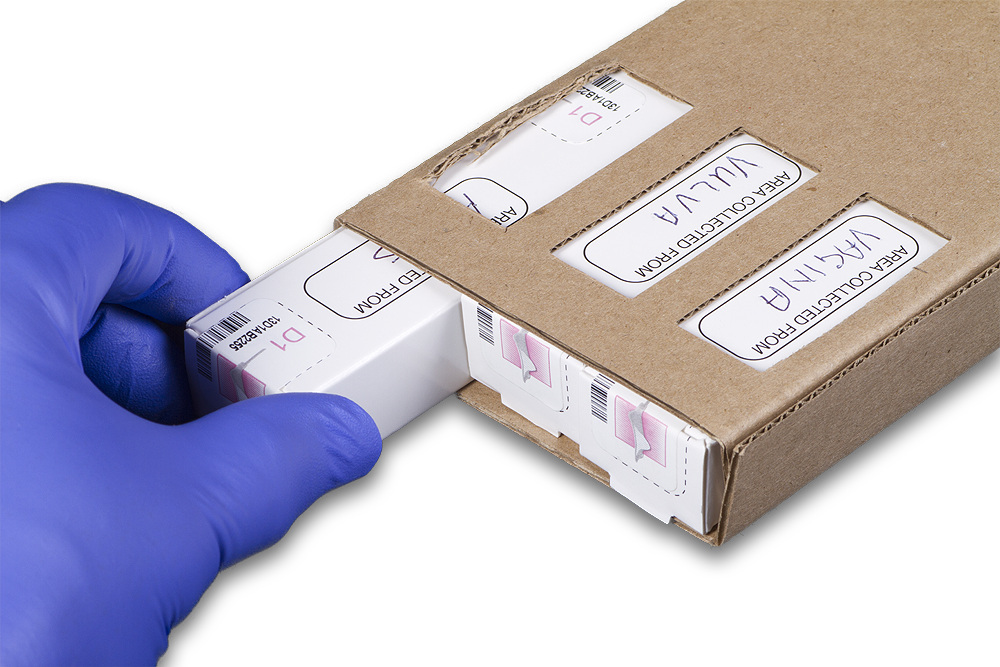
A brown cardboard protective sleeve with three empty Easi Swab Stores™
.
The three Easi Swab Stores™ will be used to collect the three completed swabs.
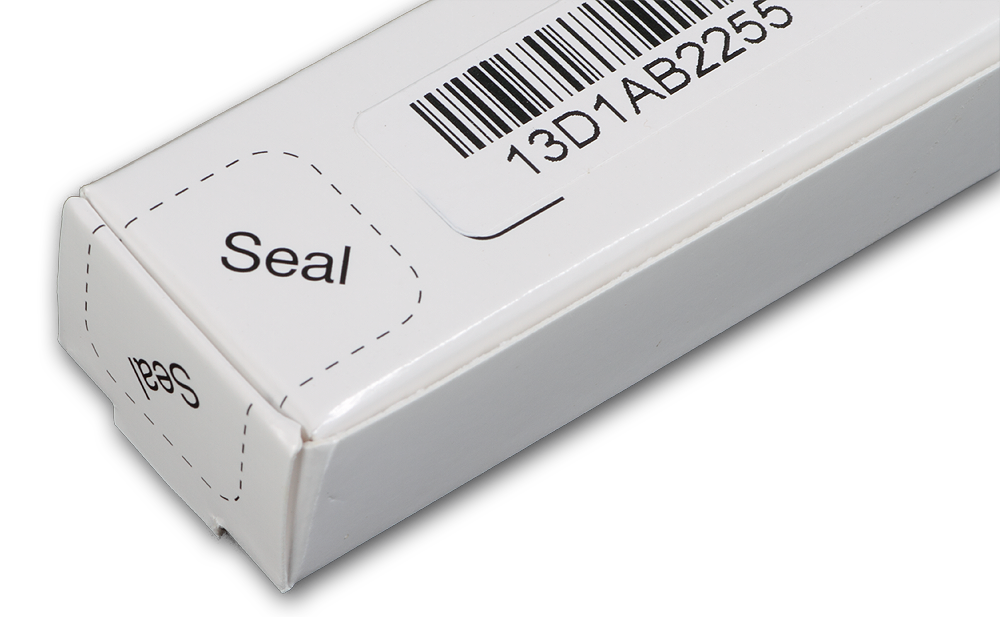
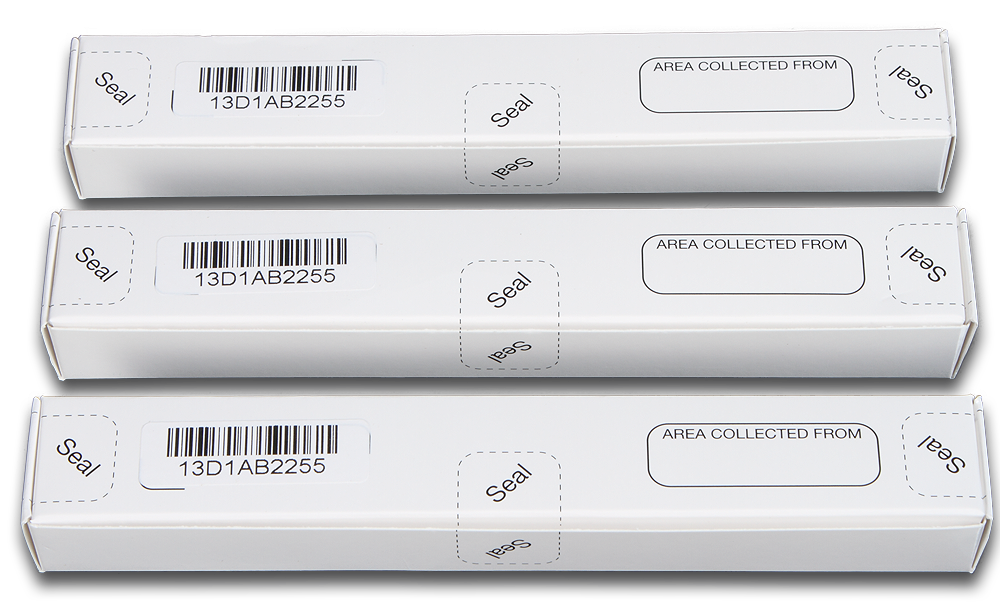
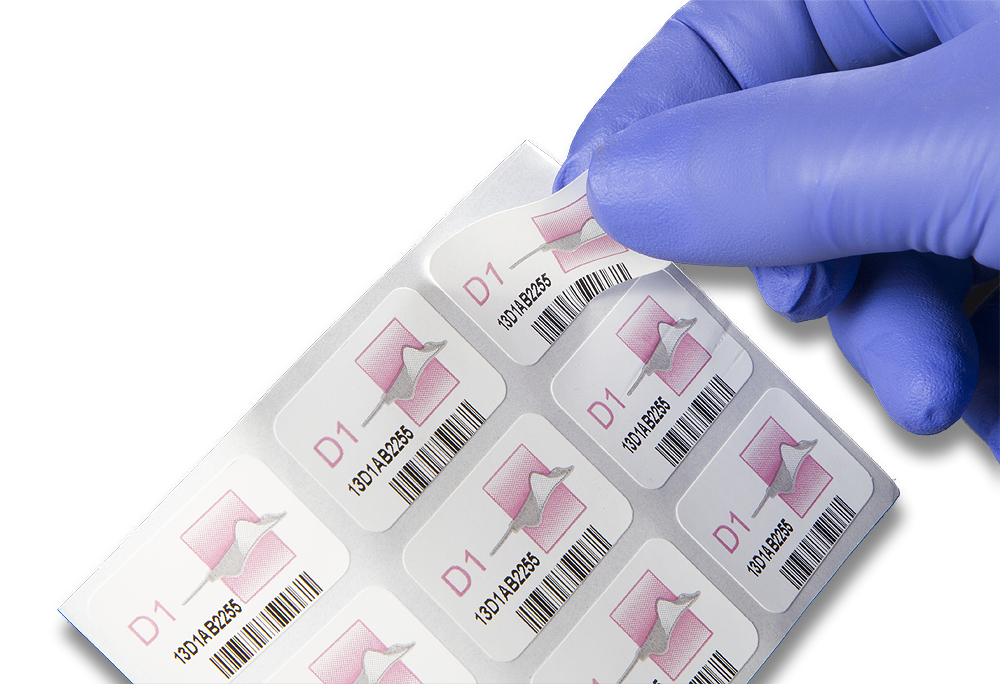
Each Easi Swab Store™ has a tracking bar code label.
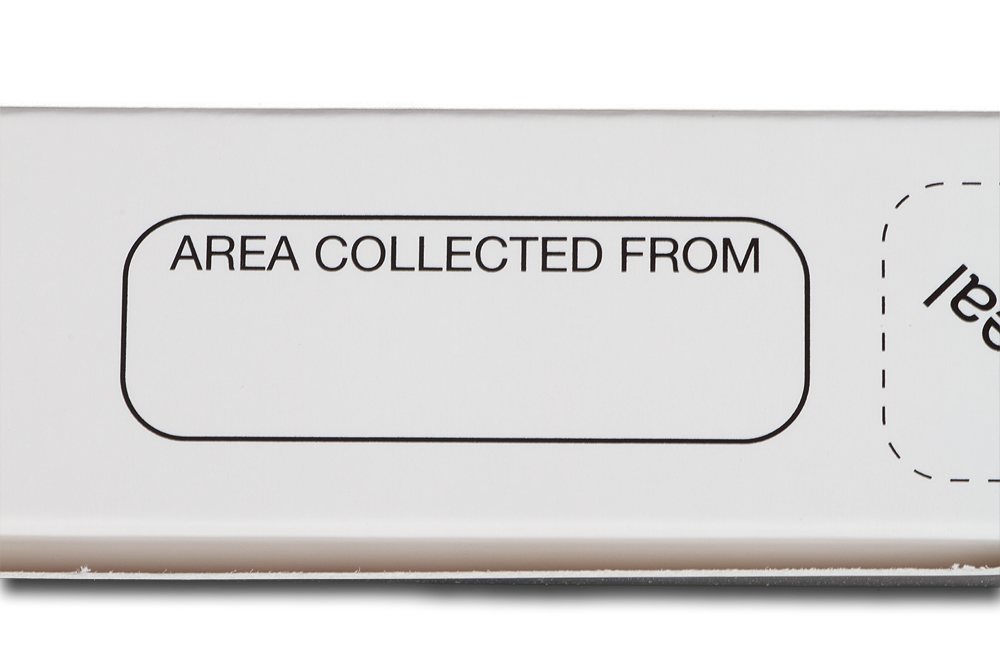
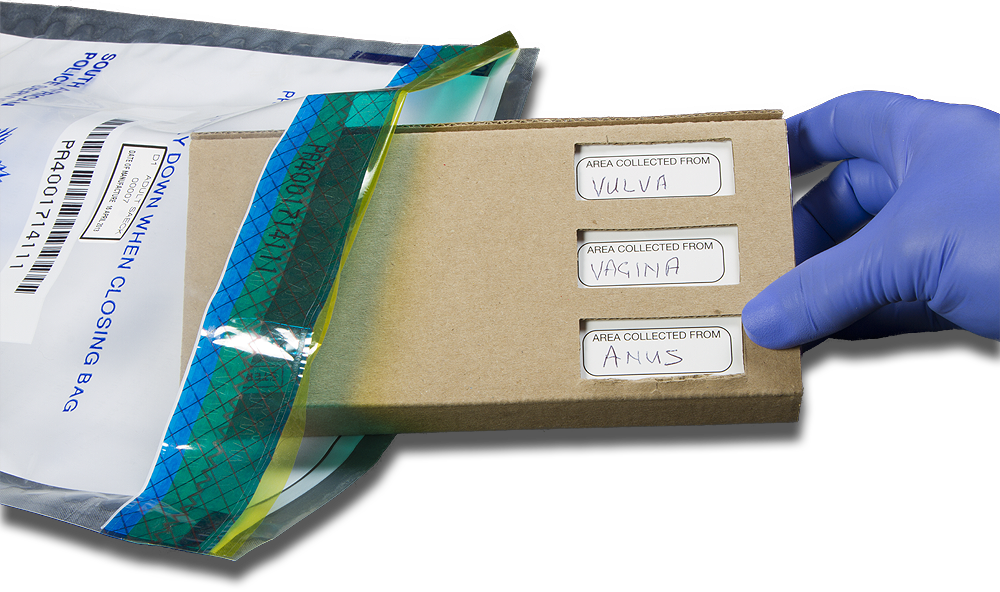
Each Easi Swab Store™ has an AREA COLLECTED FROM label.
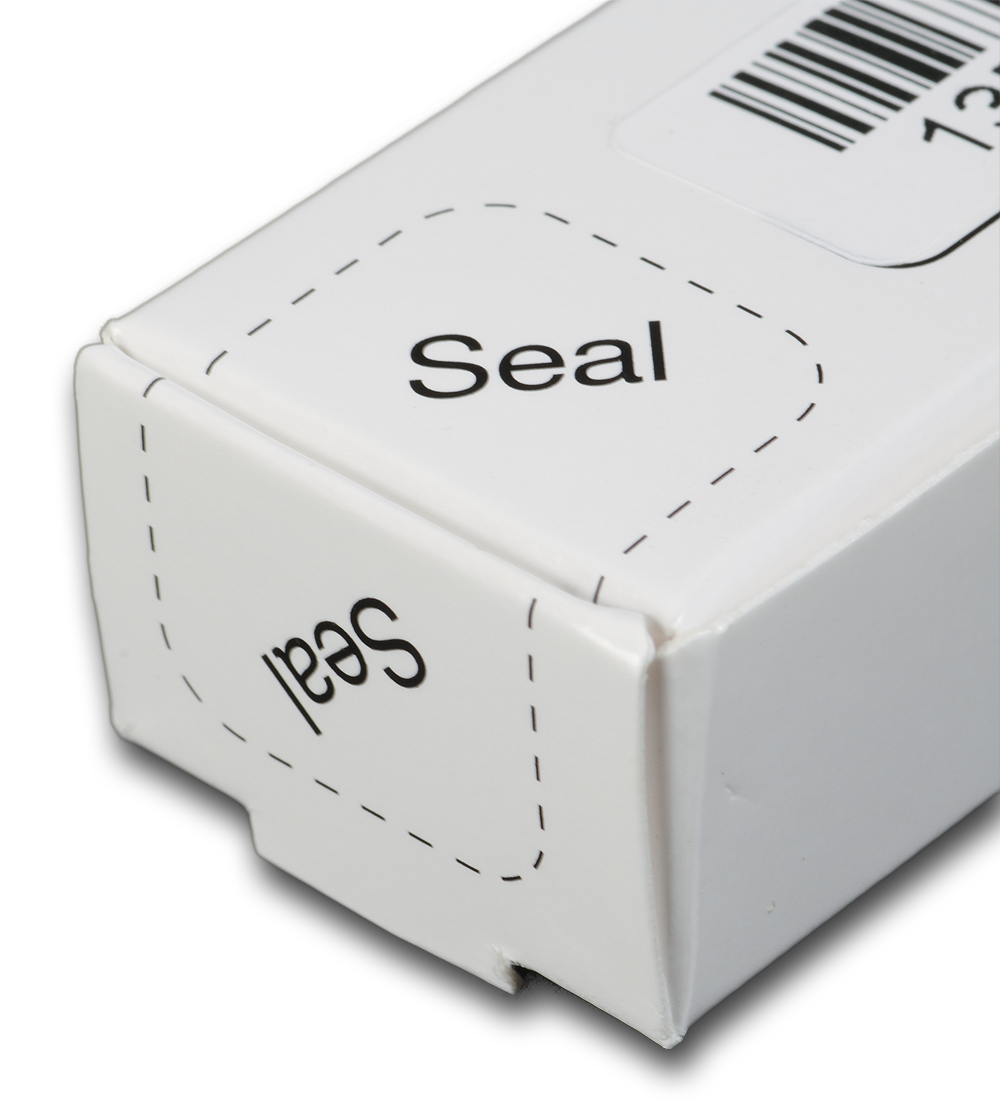
Each Easi Swab Store™ identifies where the Tamper Evident Seals must be placed.
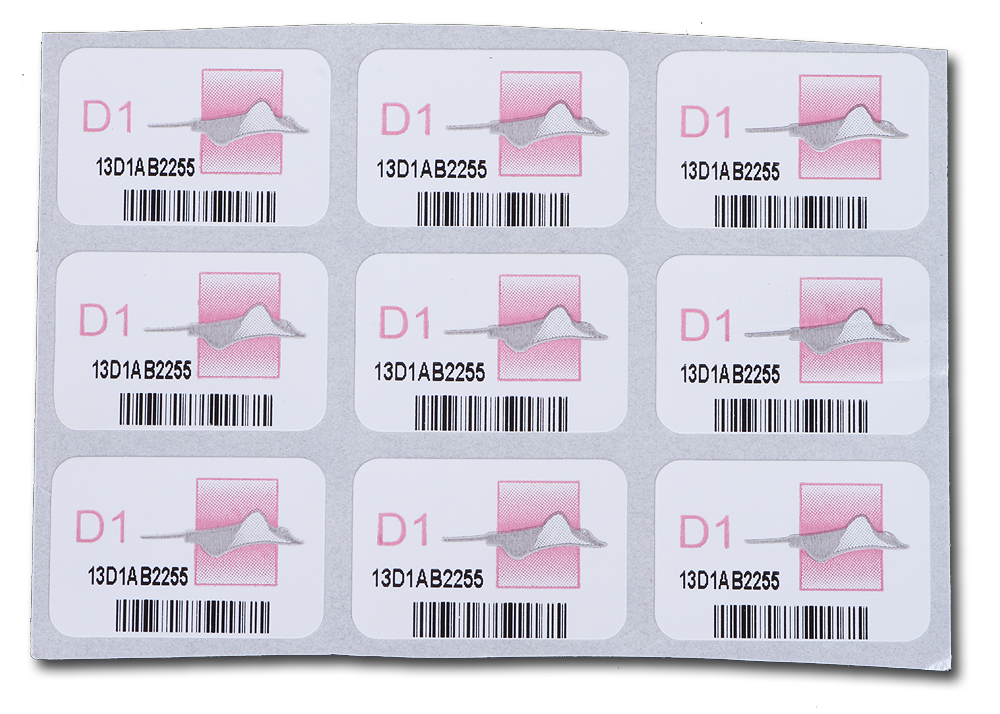
A sheet containing 9 Tamper Evident Seals.
A plastic vial of sterilized water to moisten swab heads (if required)
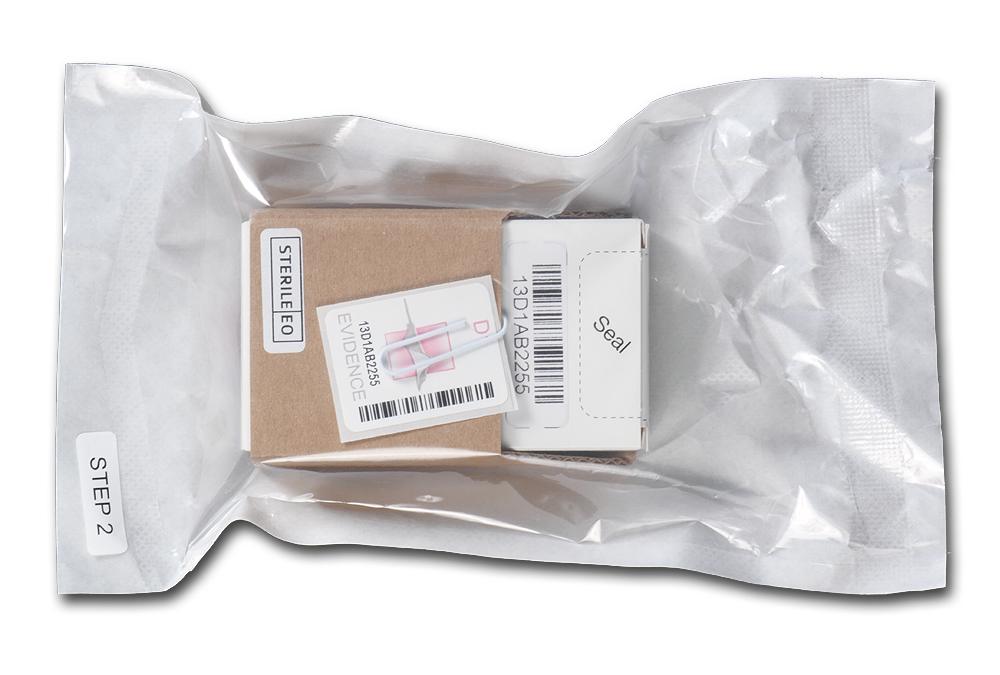
Peel Pouch – Labeled STEP 2 (sterilized)
A brown cardboard protective sleeve with an empty Evidence Collection Box inside.

The Evidence Collection Box contains a tracking bar code label.
A sheet containing 1 Tamper Evident Seal.
A marked area where the Tamper Evident Seal must be placed.
Peel Pouch – Labeled STEP 3 (sterilized)
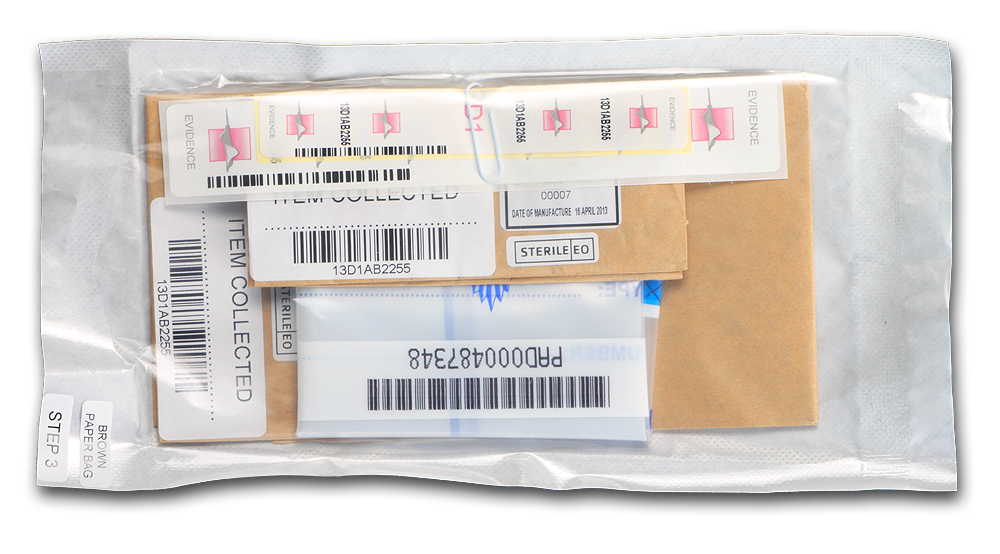
This sterilized peel pouch contains everything required to collect panties and if present, a sanitary pad from your patient.
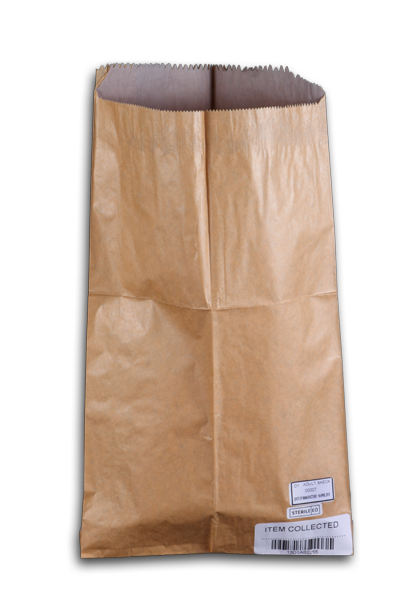
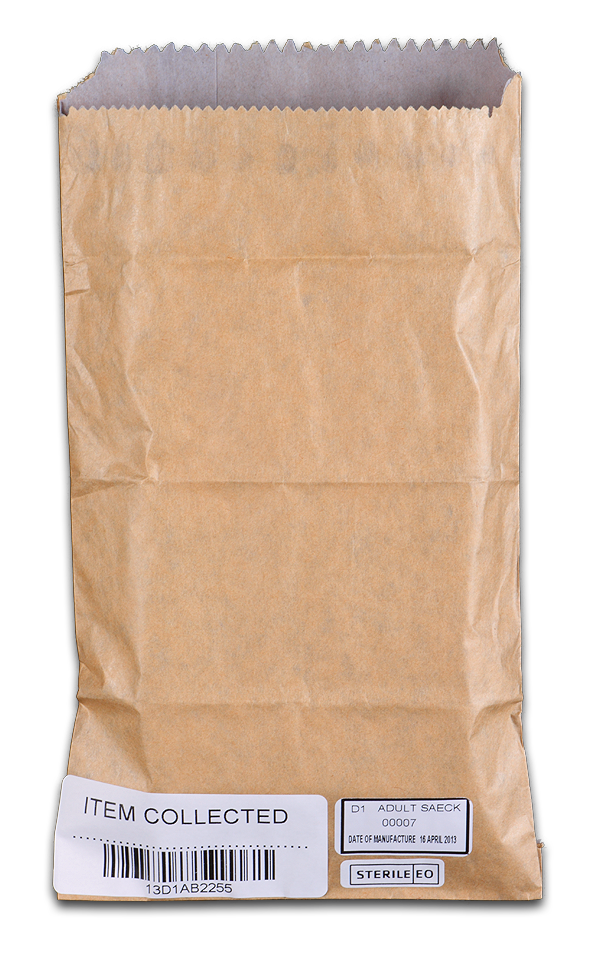
A large duplex brown paper bag for your patient’s panties
A small duplex brown paper bag for a sanitary pad
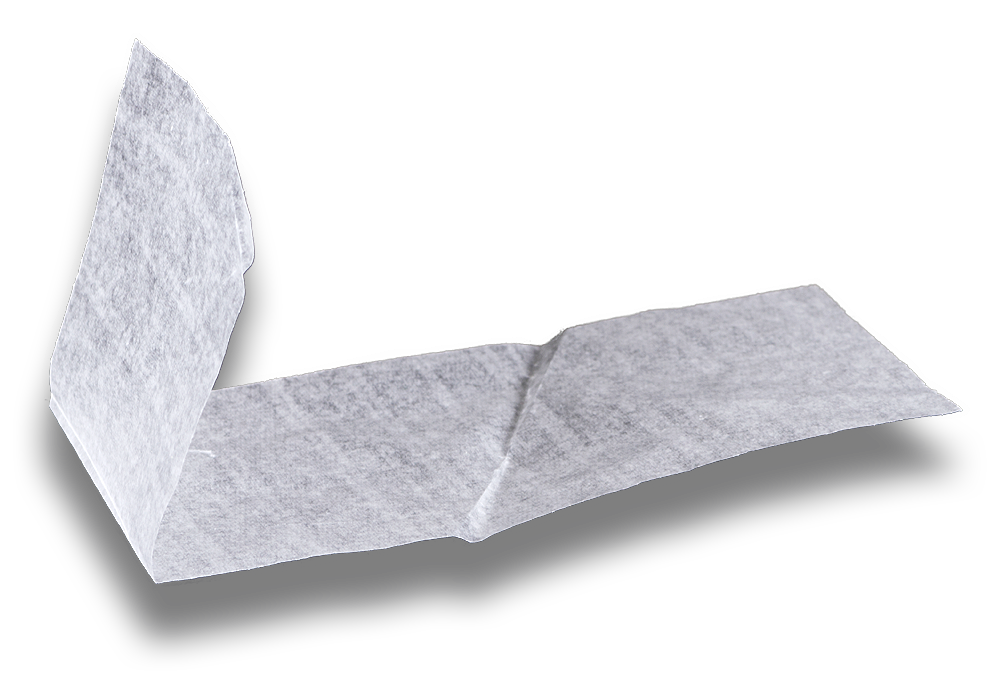
A piece of waxed paper to cover the adhesive strip on the sanitary pad.
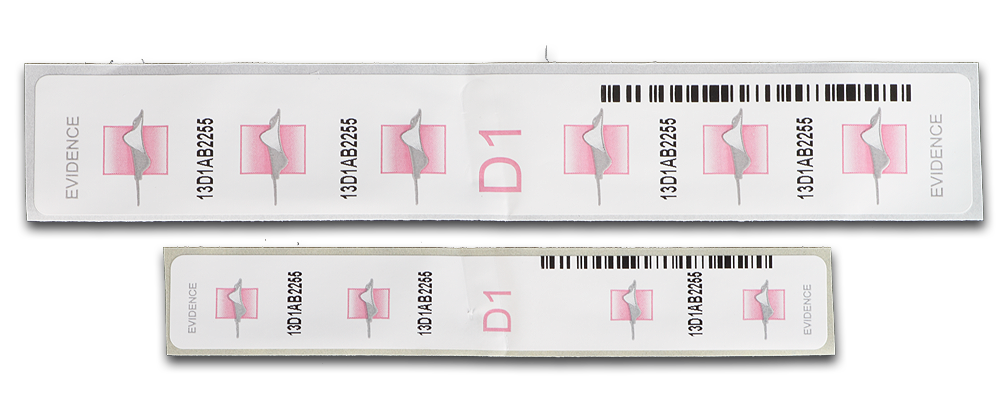
2 Long Tamper Evident Seals to seal the brown bags
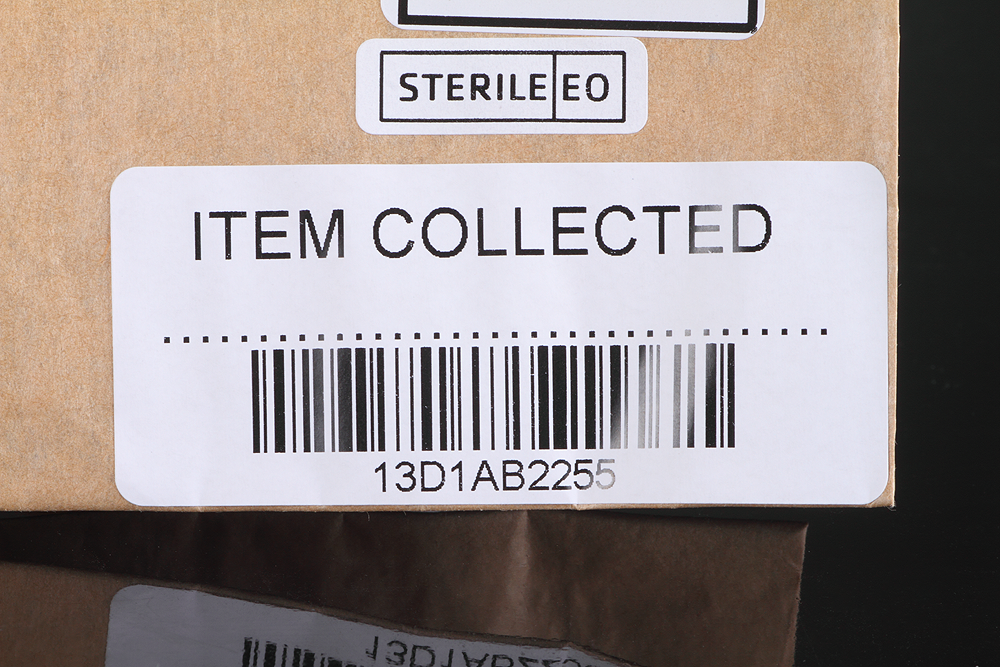
Each bag has an ITEM COLLECTED label.
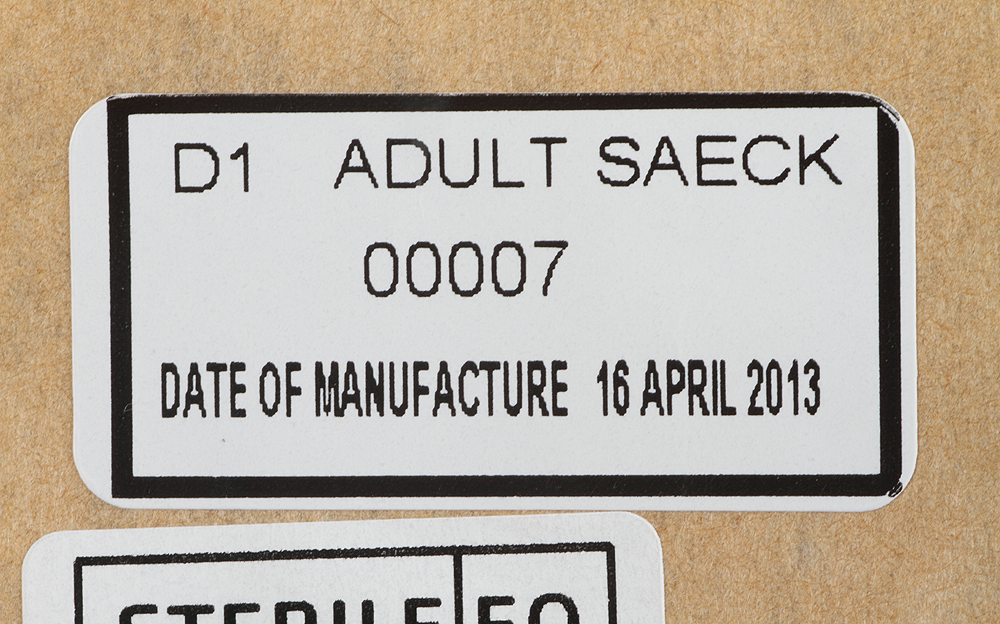
Each bag also has a Date of manufacture label.
An Evidence Sealing Bag for the collected items taken during Peel Pouch Step 3 (sealed brown bag/s)
Non sterilized items
Additional items found in the kit are:
Medical practitioner / Patient documentation. Included on this form is the “Consent to Examination” section that must be read out to your patient, who must then sign.
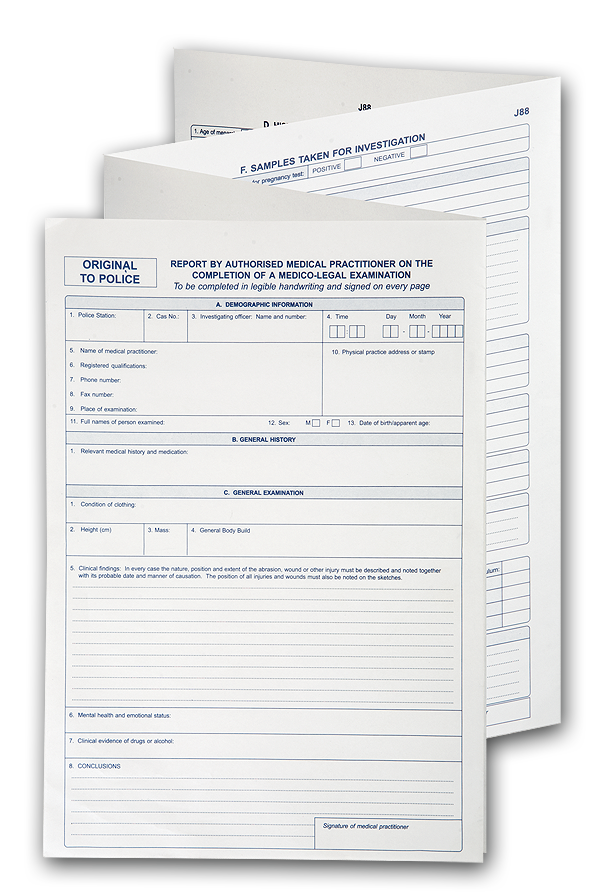
A J-88 documentation form.

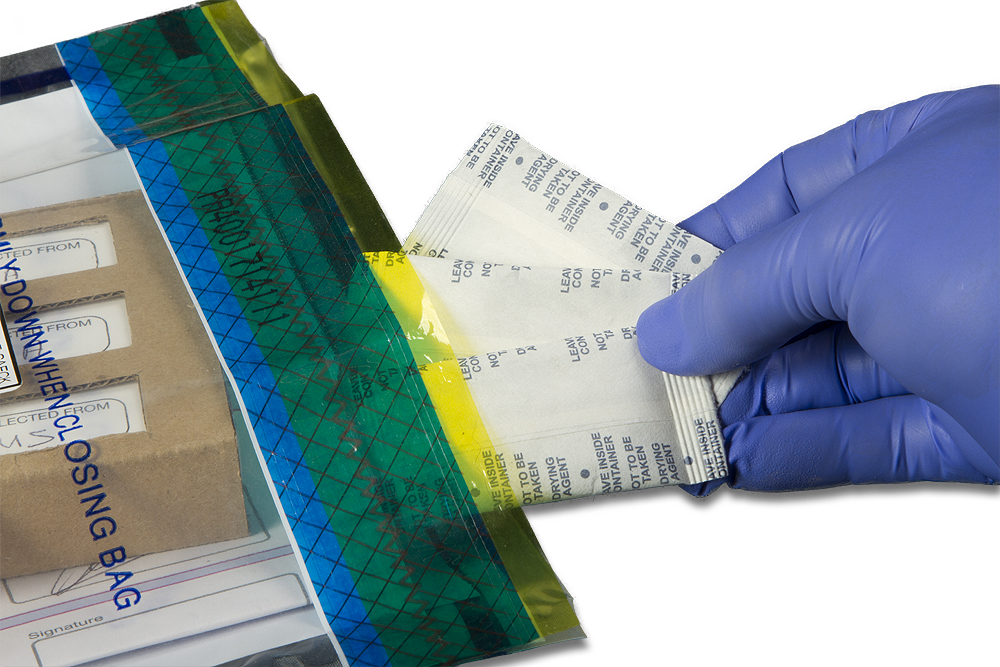
A zip-lock plastic bag that holds 6 desiccant packets (desiccants remove moisture)
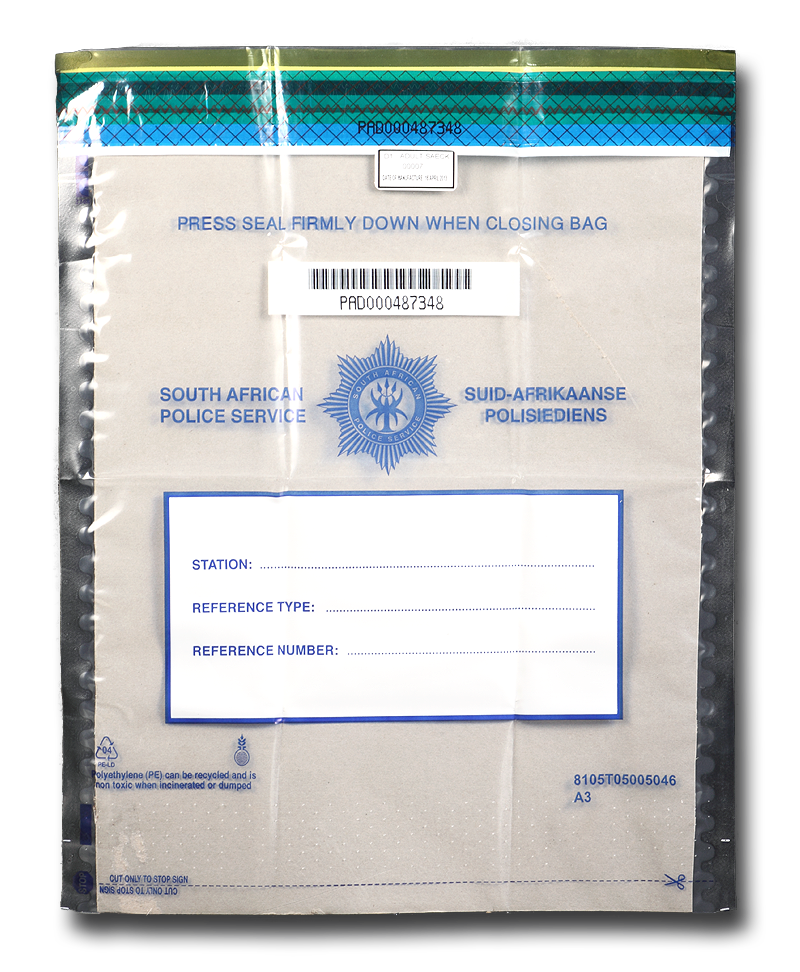
A large clear plastic bag known as an Evidence Sealing Bag.
PROCESS 1 – Documentation
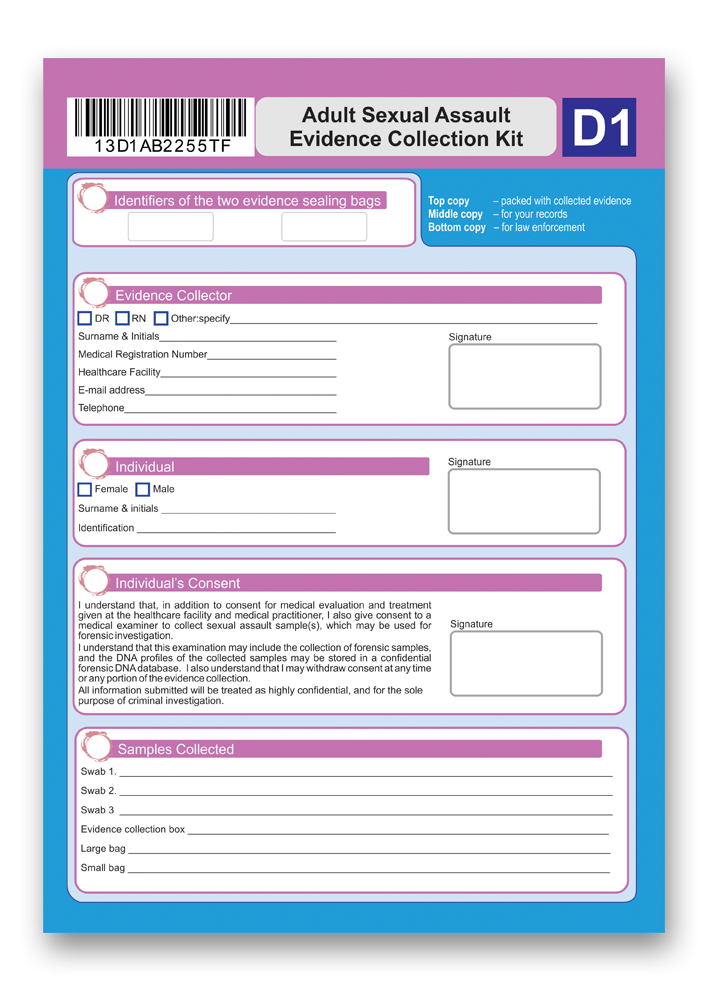
Collection of Forensic Evidence Form

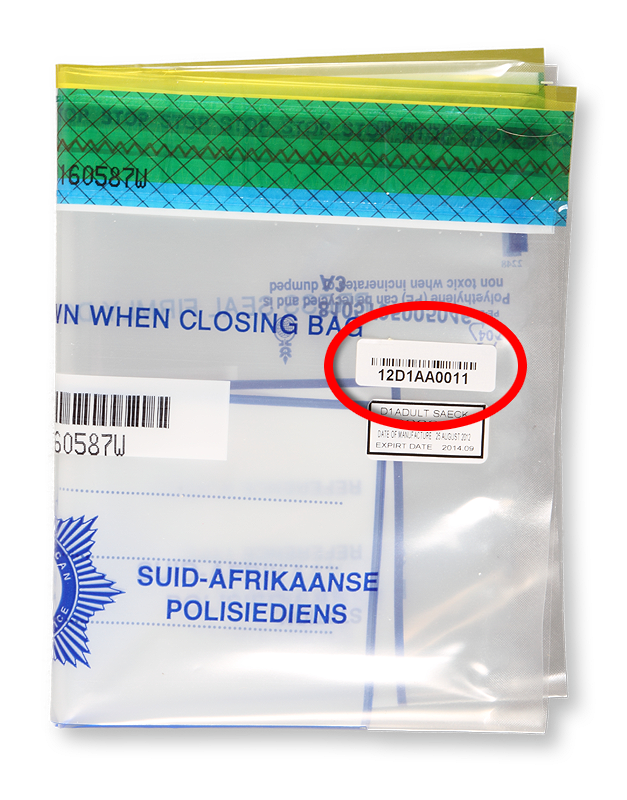
The first section of the form is the Identifiers of the two evidence sealing bags. These two identifying numbers can also be seen on the two Evidence Sealing Bags supplied inside the kit. This forms part of the traceability of evidence and insures that the contents sealed inside the Evidence Sealing Bags can be traced and matched to the information found on the documentation.
The following information should be included on this form:
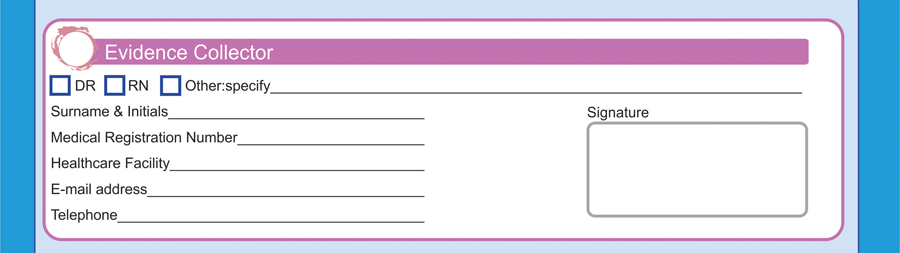
1. Evidence Collector Information and Signature
Please complete this section with as much detail as possible and sign your name. Should it be necessary please assist the patient in completing the section under “Individual”.
2. Individual Information and signature
This part must be completed by the patient (or by you), as detailed as possible. It must be signed by the patient or his / her legal guardian. It is essential to obtain authorization for the collection of evidence, see point 6.

3. Individual’s Consent and signature
Obtaining a patient’s consent prior to conducting a medical examination or administering treatment is standard medical practice. With the advent of evidence collection requirements and crisis intervention services, sexual assault patients are expected to make a decision about consent to these procedures as well.
Informed consent should be a continuing process that involves more than obtaining a signature on the form. When under stress, many patients may not always understand or remember the reason for, or significance of unfamiliar, embarrassing and sometimes intimidating procedures. Therefore, all procedures should be explained as thoroughly as possible, so that the patient understands what the attending medical personnel are doing and why.
Read this Individual Consent text to your patient and ask them to sign.

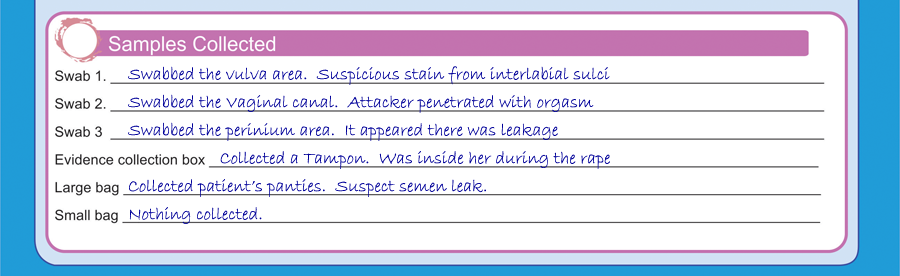
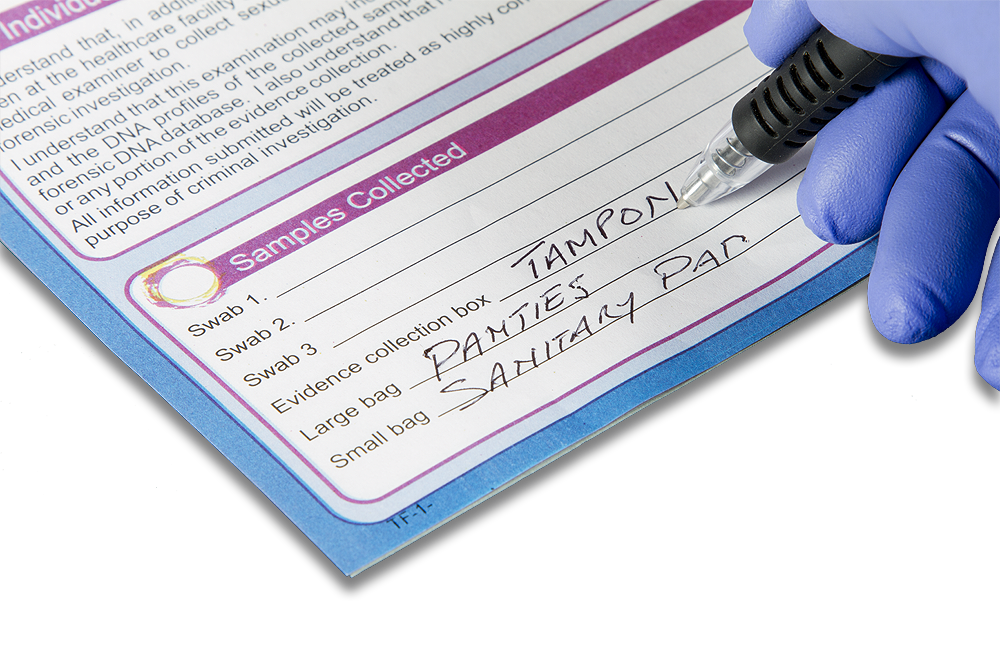
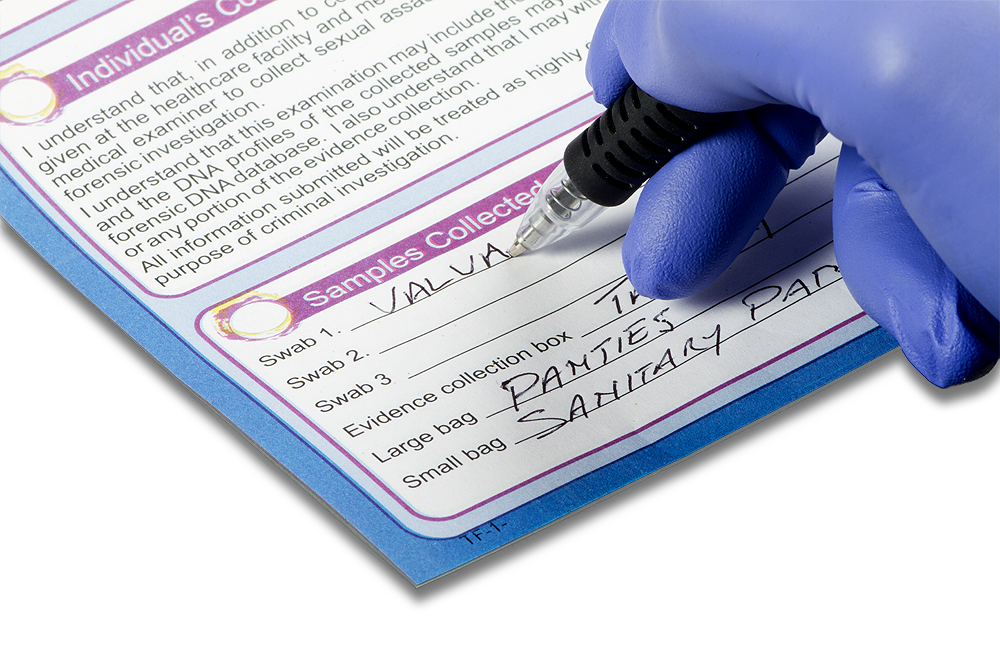
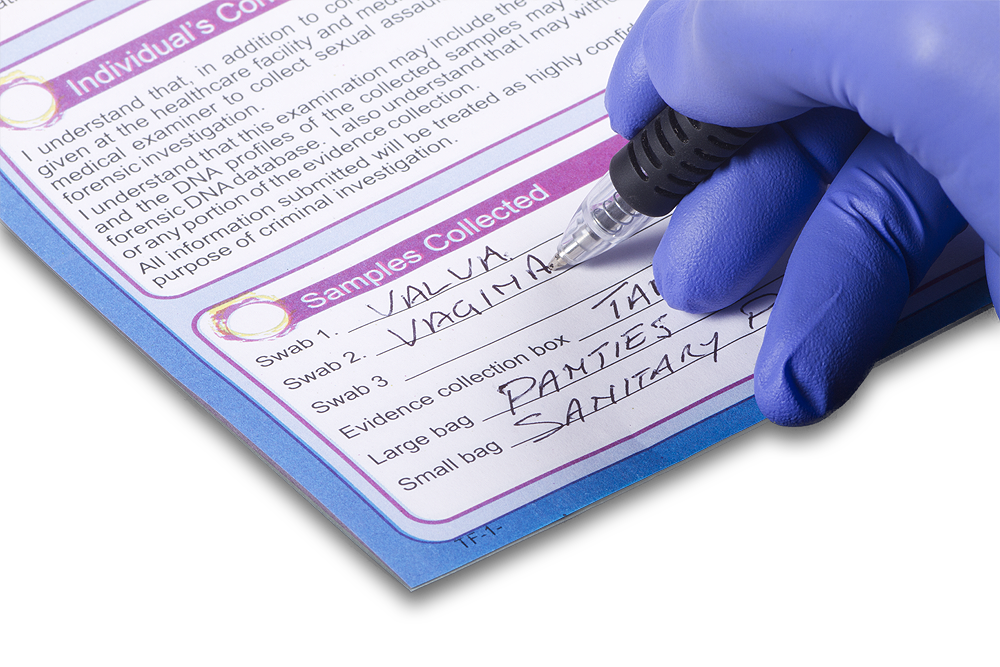
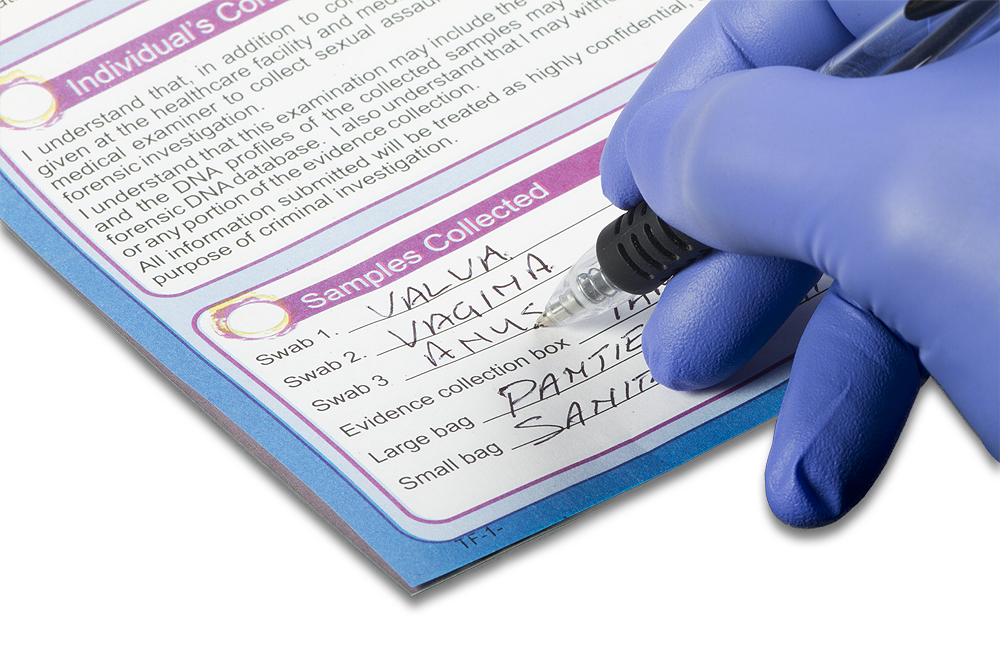
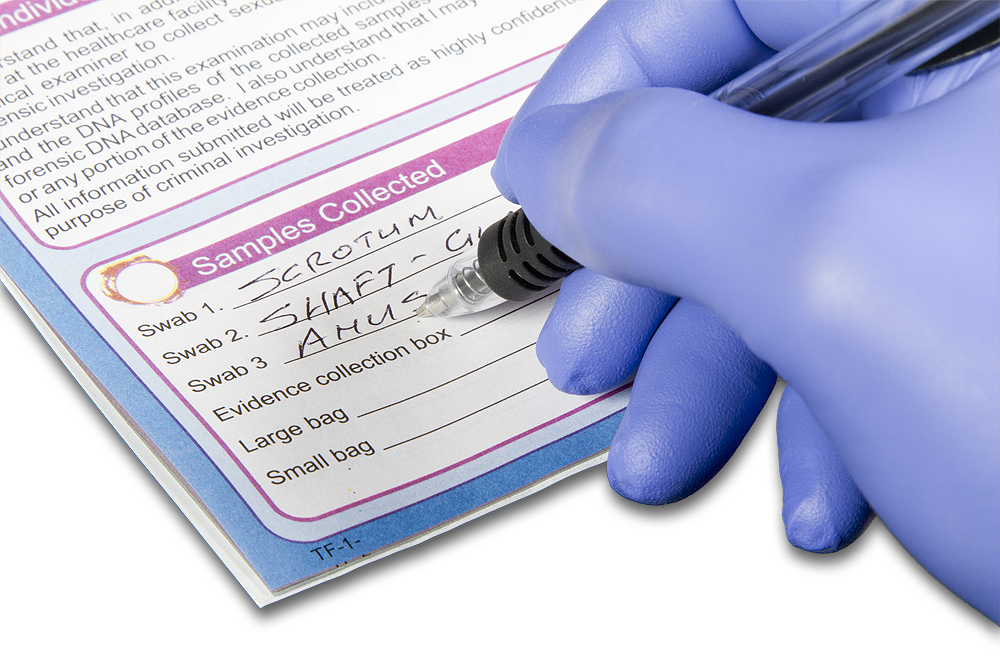
4. Samples Collected
This section is to record what was collected, which samples were taken and from which part of the body the swabs were used on. It is recommended that as you collect a sample or item, you immediately write it on the form. Here is an example:
- Swab 1 Swabbed the vulva area. Suspicious stain from interlabial sulci
- Swab 1 Swabbed the Vaginal canal.
- Swab 1 Swabbed the perinium area. It appeared there was leakage
- Evidence Collection Box Collected a Tampon. Was inside her during the rape
- Large bag Collected patient’s panties. Suspect semen leak.
- Small bag Nothing collected.
5. End of Collection
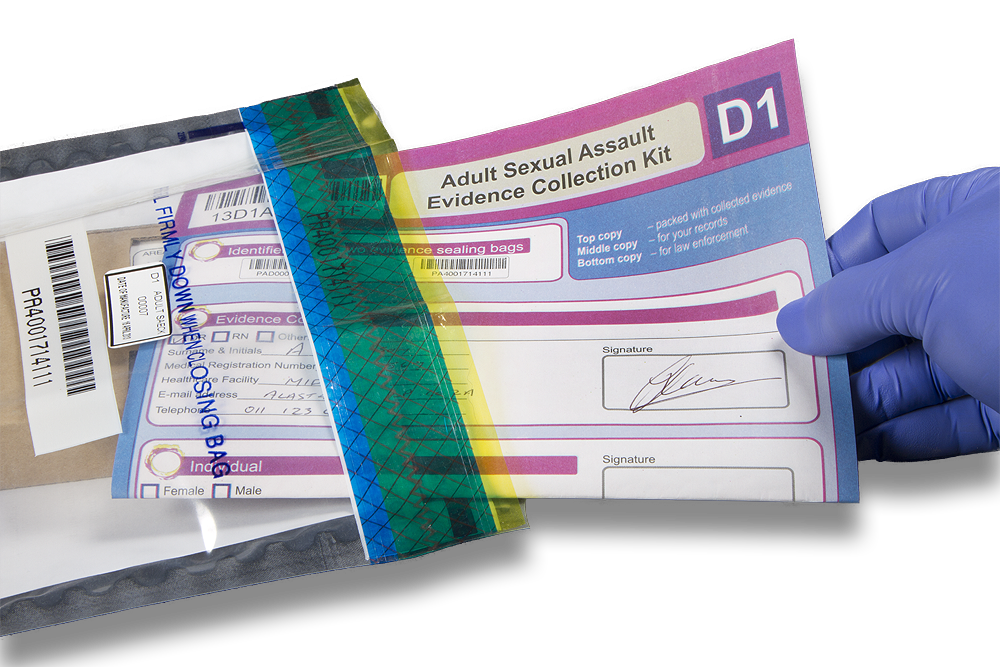
This form is in triplicate, the top copy must be packed into the larger Evidence Sealing Bag along with the swabs and evidence collection boxes. The middle copy is to be kept by you for your records and the bottom copy gets handed to the Law Enforcement Officer that will collect the two Evidence Sealing Bags. (do not staple the form to the Evidence Sealing Bag).
White – Top copy – Place into evidence sealing bag
Pink – Middle copy – For your records
Green – Bottom copy – Hand to Police Officer
PROCESS 2 – Clothing Collection

When you meet your patient on arrival, asses whether the patient is wearing the same clothing as when assaulted. If the answer is;
Inform the attending police officer of the need to collect the clothing worn at the time of the assault.
To collect the rest of her clothing, which may contain vital evidence of a crime, a D5 Clothing Collection Kit needs to be used to collect the other clothing.
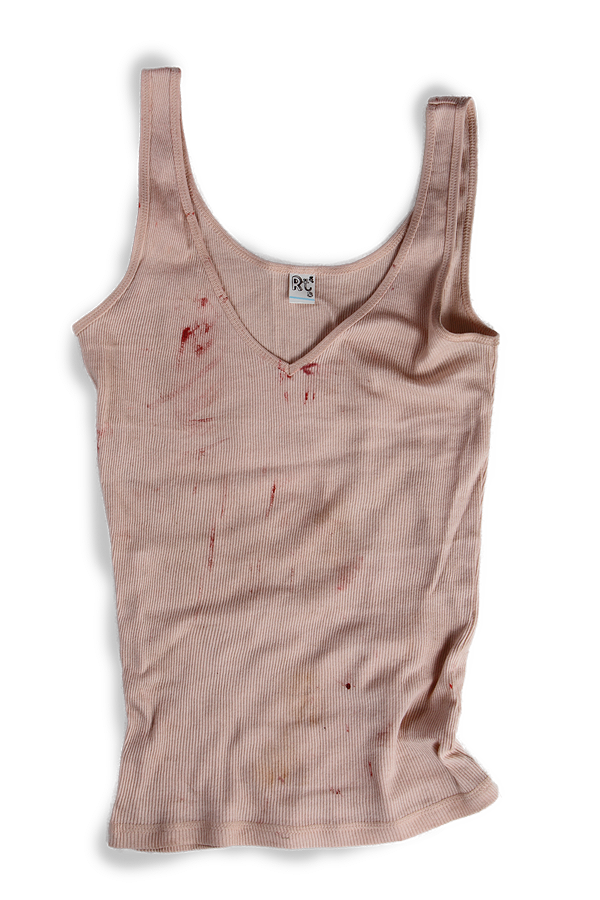
Clothing often contains important evidence. Clothing offers a surface on which traces of foreign matter may be found, such as the perpetrator’s semen, saliva, blood, hair and fibres, as well as debris from the crime scene.
Damaged or torn clothing may serve as significant evidence itself. Clothing may offer physical evidence of force of struggle.
The D5 Clothing Collection Kit should be used, completed and sealed before opening this D1 Kit.
Before starting with this D1 clothing collection ensure that you are now wearing a clean pair of gloves.
- Start by opening the peel pouch marked STEP 3
- Remove the large brown paper bag.
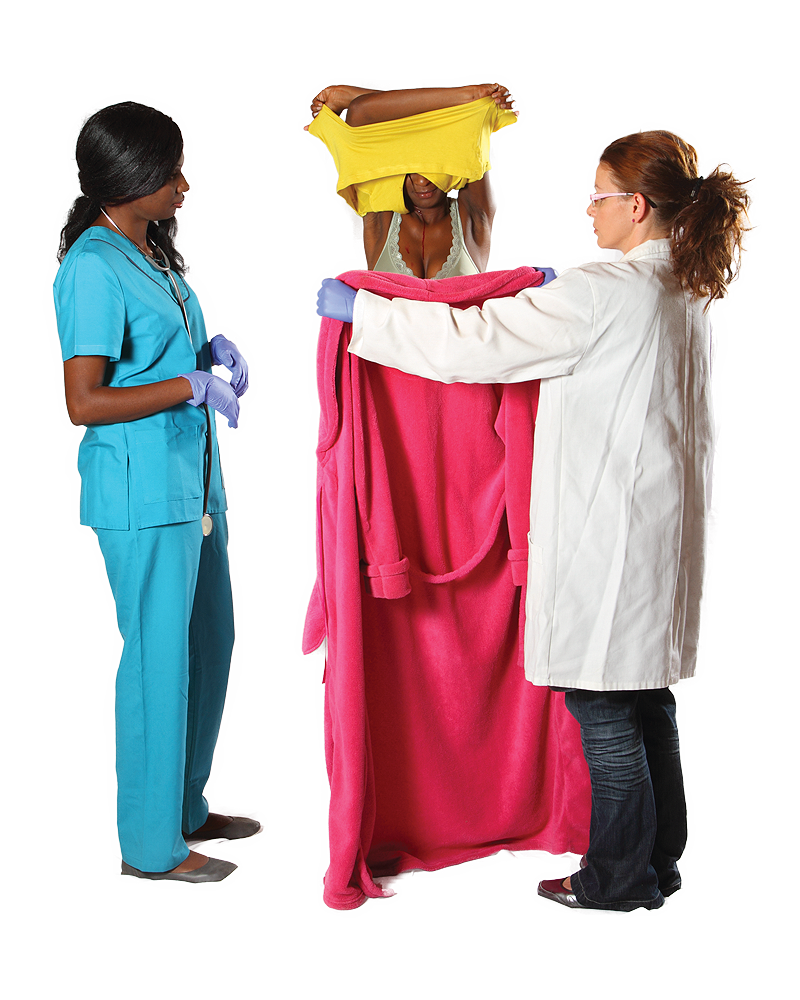
- Patient puts on a gown and removes panties.
- Hold open the paper bag and let the patient place the panties into the bag or hand them to you to place into the bag. As this illustration shows,
- do not place more than one piece of clothing into the same bag.
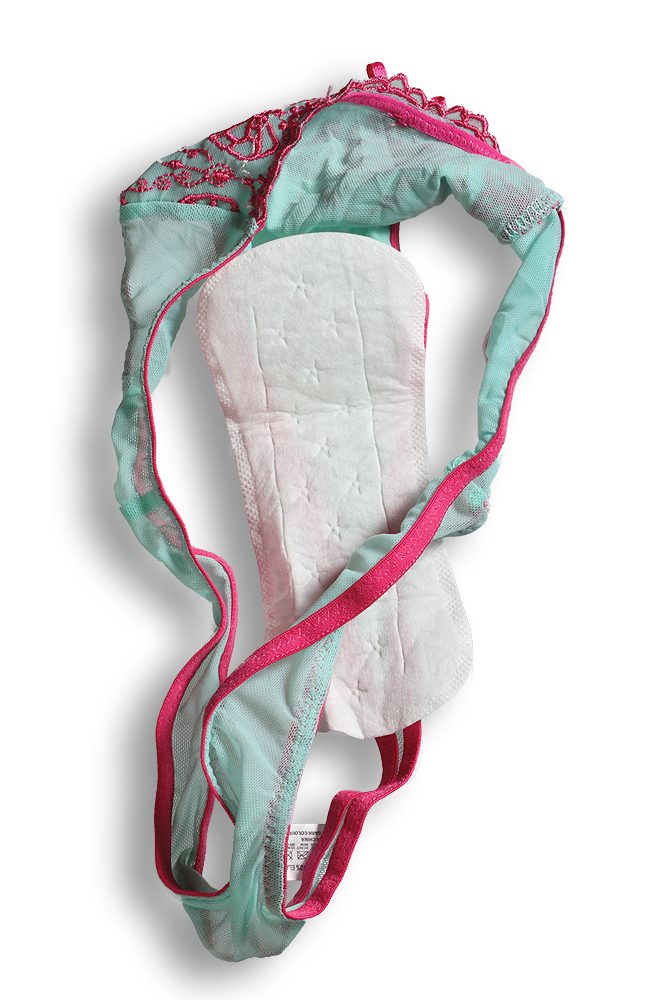
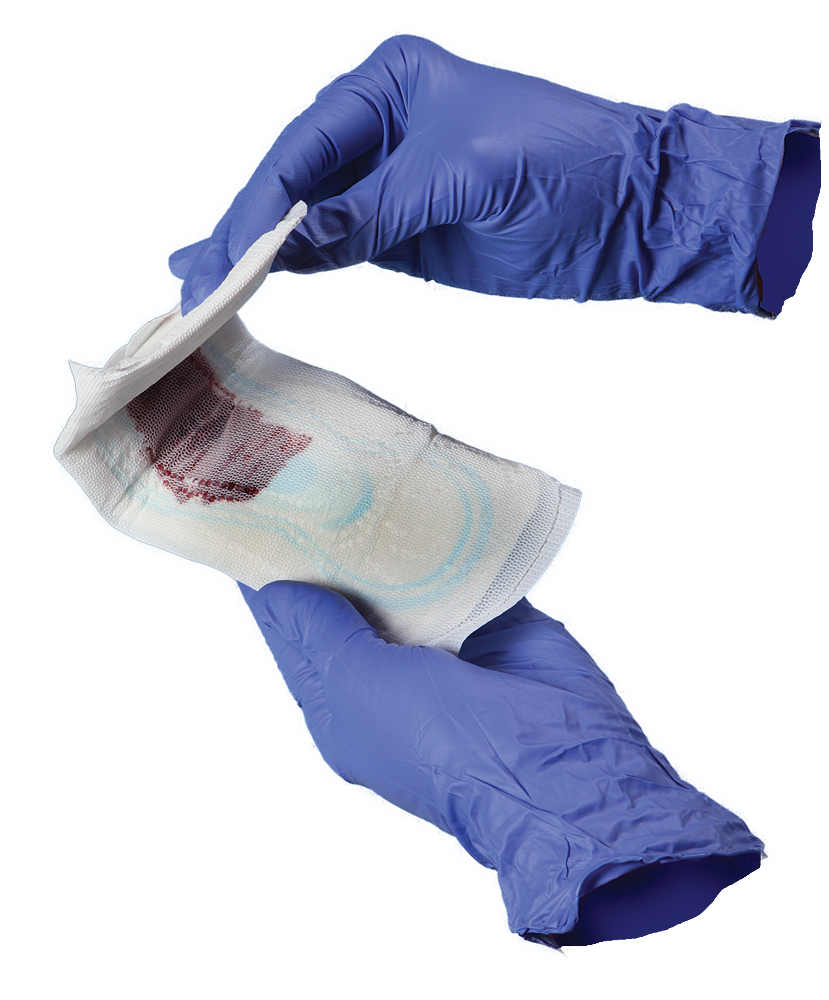
- If a sanitary pad is attached, remove the small brown bag and the wax paper strip from the peel pouch. Attach the wax strip to cover the adhesive area of the sanitary pad to stop the pad sticking to the bag and place the pad into the small paper bag.

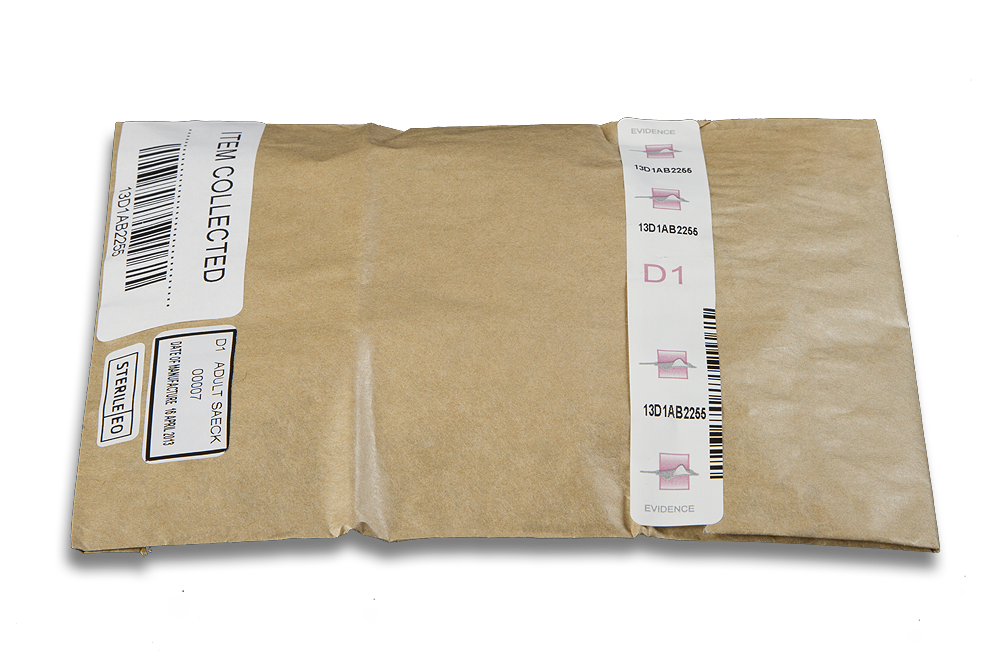
- To seal the brown paper bags, fold the opening over, peel off a Tamper Evident Seal (found in the peel pouch) and seal the paper bag closed with the Tamper Evident Seal horizontally across the opening.
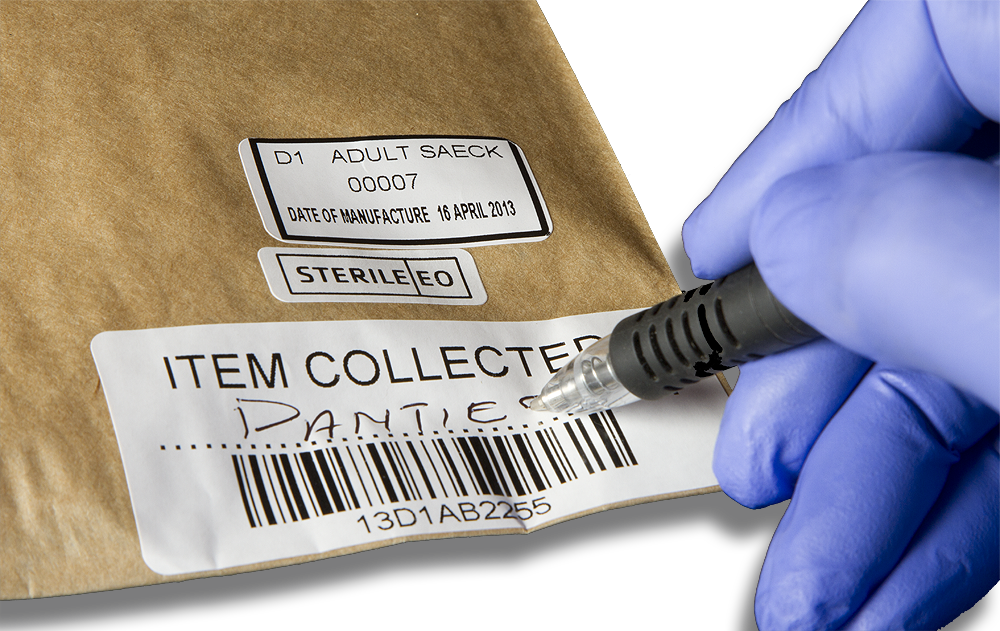
- The label marked ITEM COLLECTED on the brown bags must be filled in, example: ITEM COLLECTED – Panties
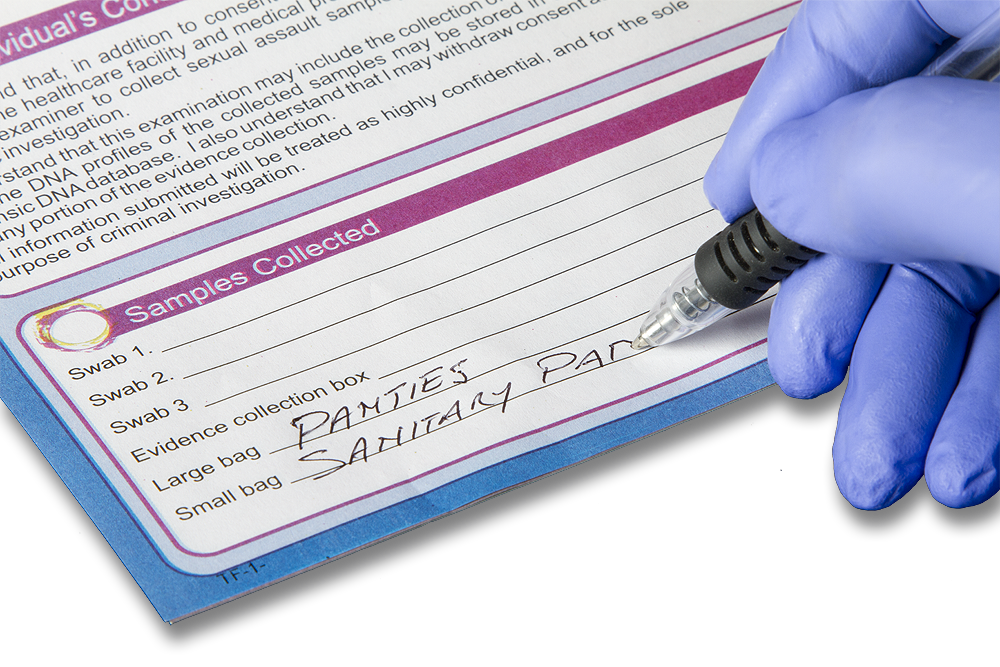
- Also indicate the items collected on the documentation Form under Samples Collected – Large bag – Panties Small bag Sanitary pad
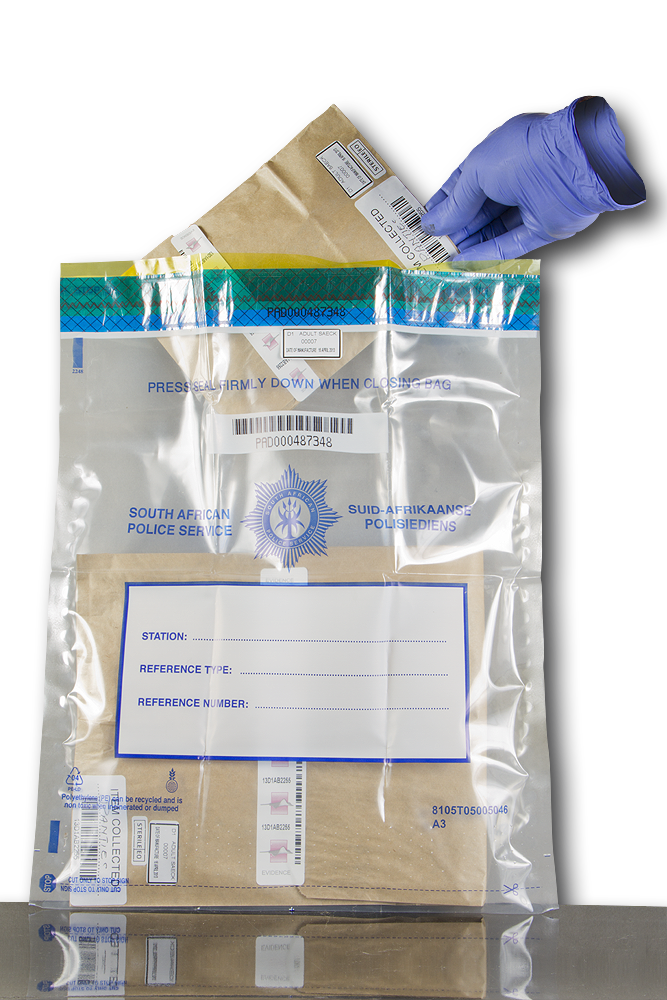
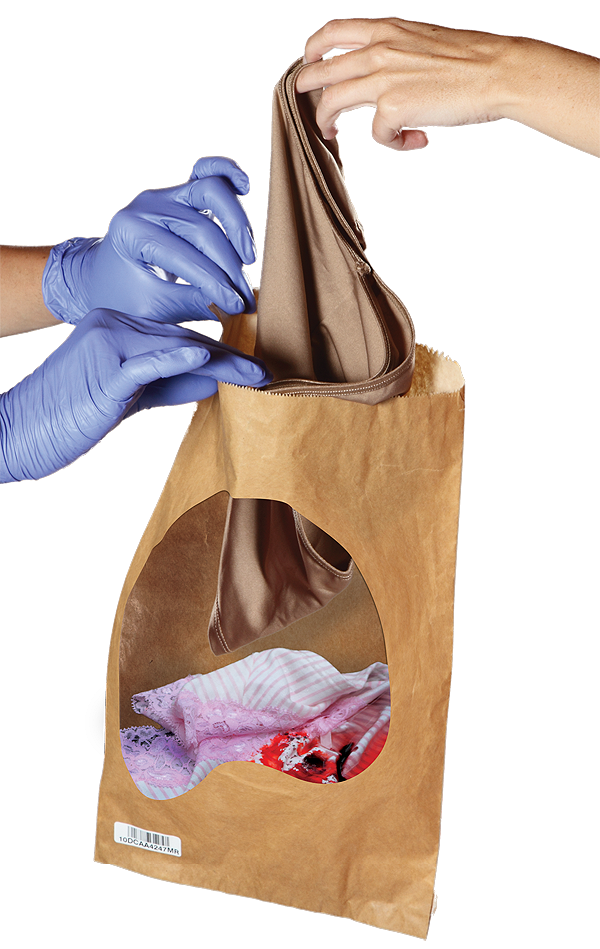
- Place the sealed brown paper bag/s sample into the smaller of the two clear plastic Evidence Sealing Bags.
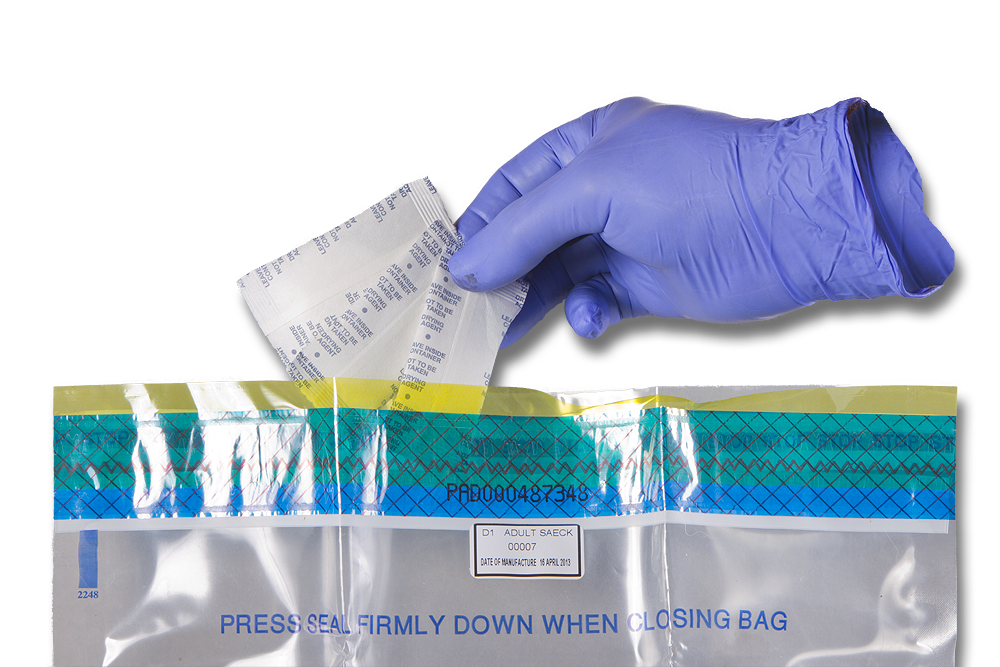
- Part of the D1 kit content is a plastic zip-seal bag with 6 desiccants. Remove 3 desiccants and place them into the Evidence Sealing Bag containing the paper bag samples.
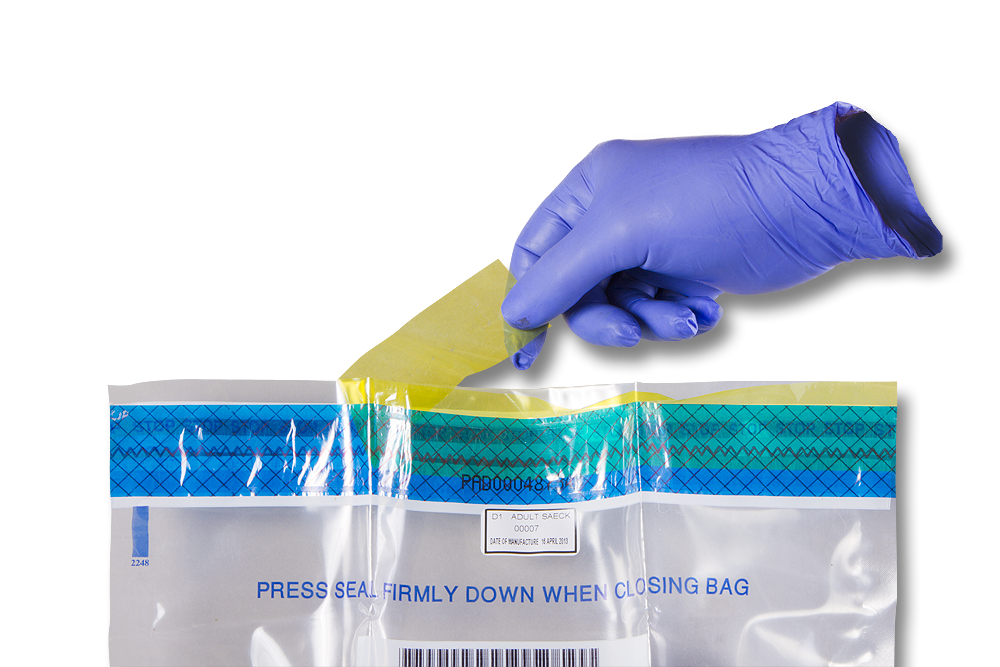
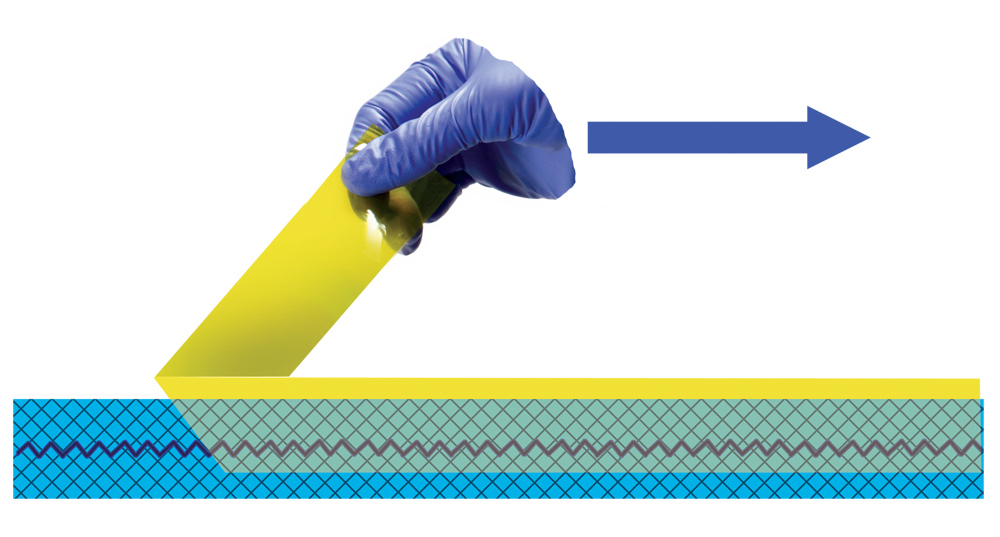

- Now seal the Evidence Sealing Bag by peeling away the yellow backing tape. Start peeling the yellow tape from one side while pressing the sticky surface closed. Continue peeling the yellow tape and pressing closed until the bag is sealed. Apply pressure to ensure that the seal is completely sealed.

- PROCESS 2 using Peel pouch – STEP 3 is now complete. Discard any unwanted items from step 3. Let your patient know that you are finished with this step.
PROCESS 2b – Tampon Collection
A tampon inserted for menstruation during the time of the attack or inserted after the assault is a very good collector of semen and is a very important source of evidence for the Forensic Laboratory.
Before starting this collection, ensure that you are wearing a clean pair of gloves.
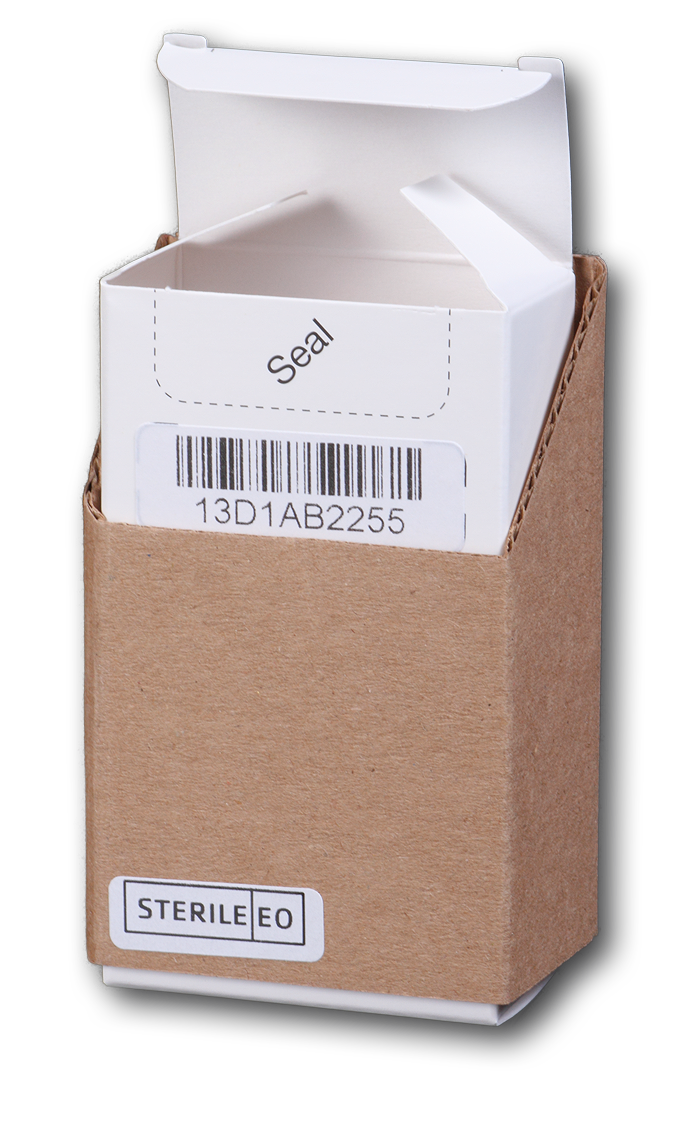
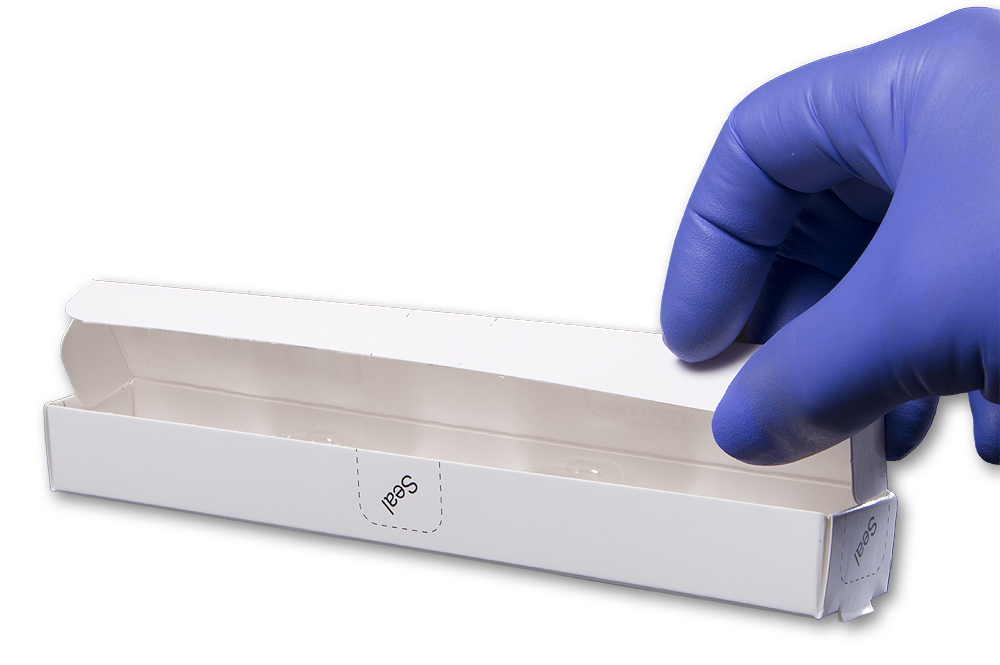
Collecting the tampon is part of the pouch marked STEP 2. This pouch contains a white Evidence Collection Box inside a brown protective sleeve and one short Tamper Evident Seal.
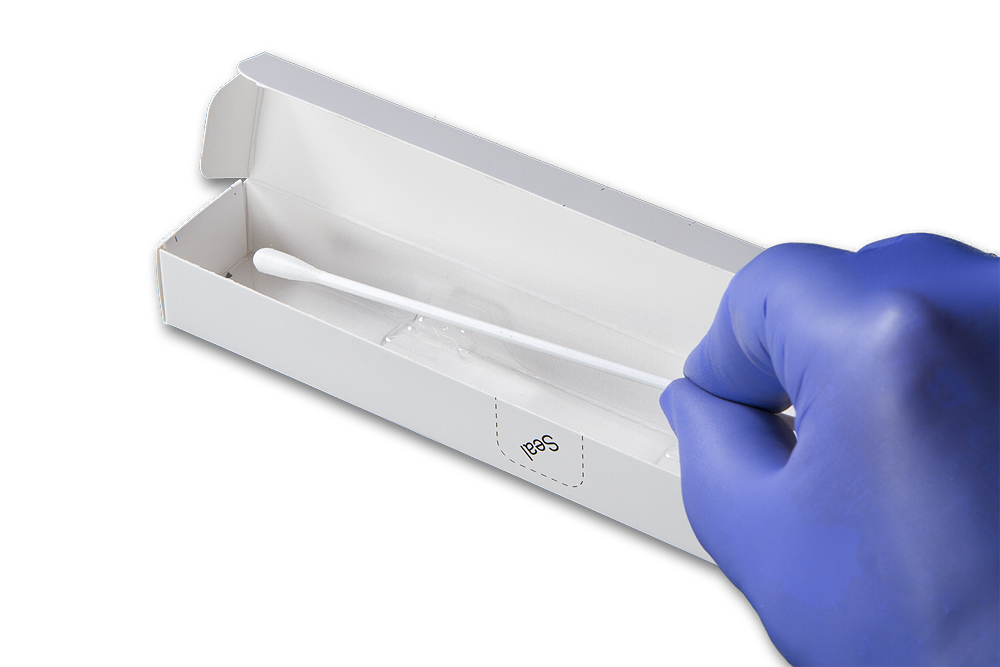
Open one end of the white Evidence Collection Box and collect the tampon from your patient.
Place the tampon directly into the box
If no tampon is present but a condom or other relevant evidence is present you may collect it in this box. Please note, only one item may be placed into the Evidence Collection Box, choose the item that may carry the most DNA evidence.
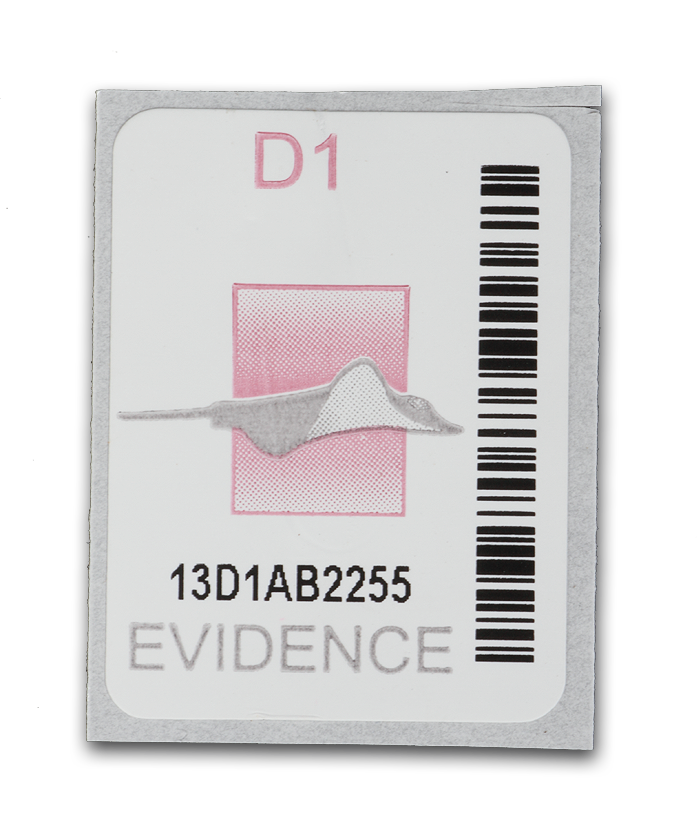
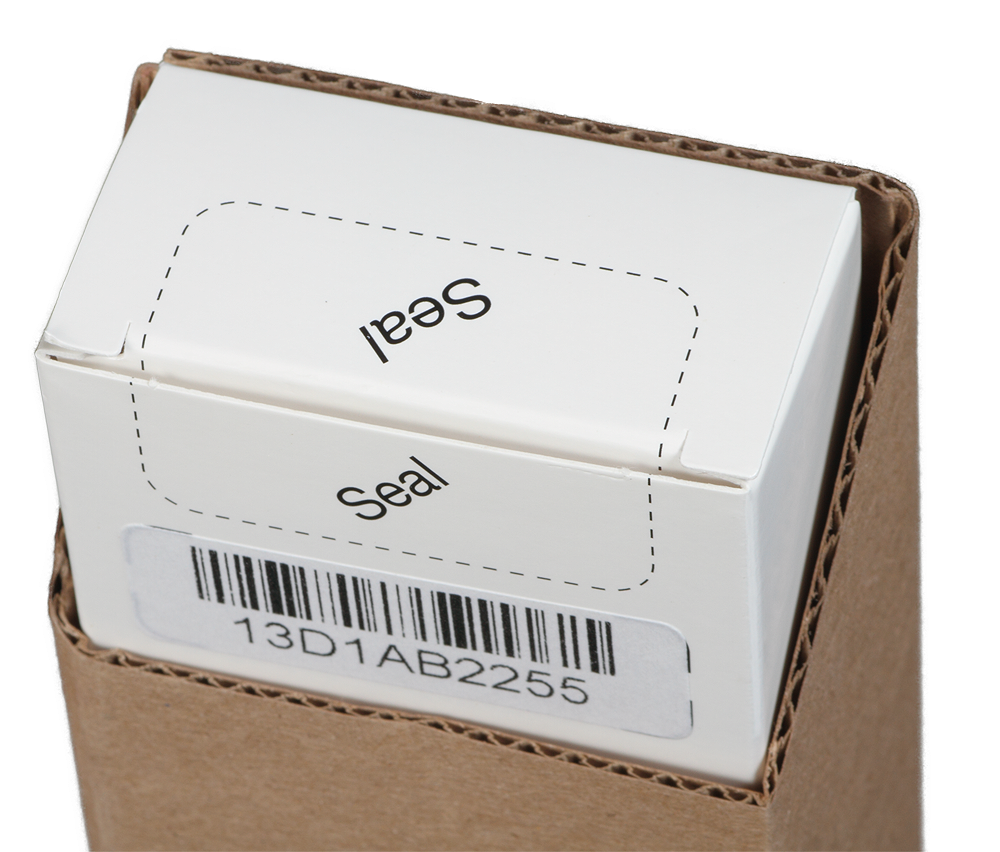
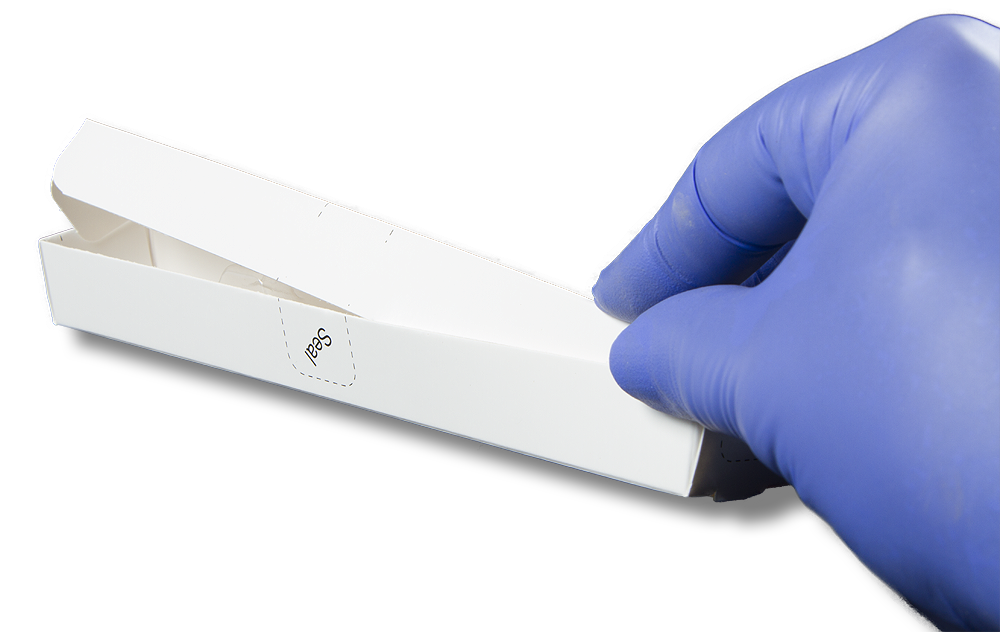
Once you have collected your sample, close the lid and place a short Tamper Evident Seal so that the seals make it impossible to open the box without leaving signs of tampering.
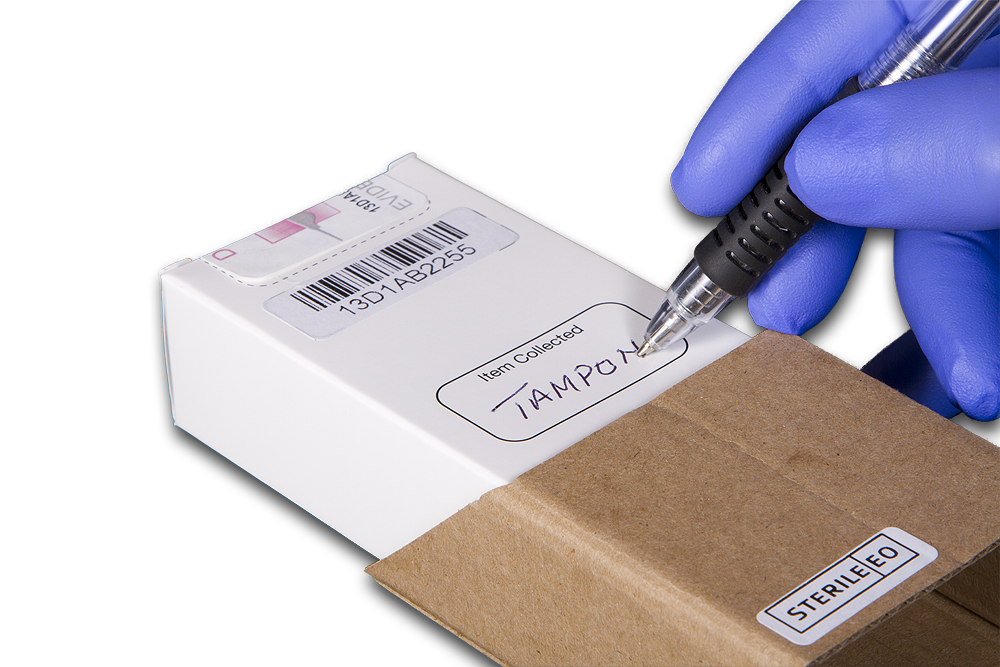
There is a label marked ITEM COLLECTED on the white box and this must be filled in, example: ITEM COLLECTED – Tampon
Also indicate the items collected on the documentation Form under Samples Collected – Evidence Collection Box – Tampon
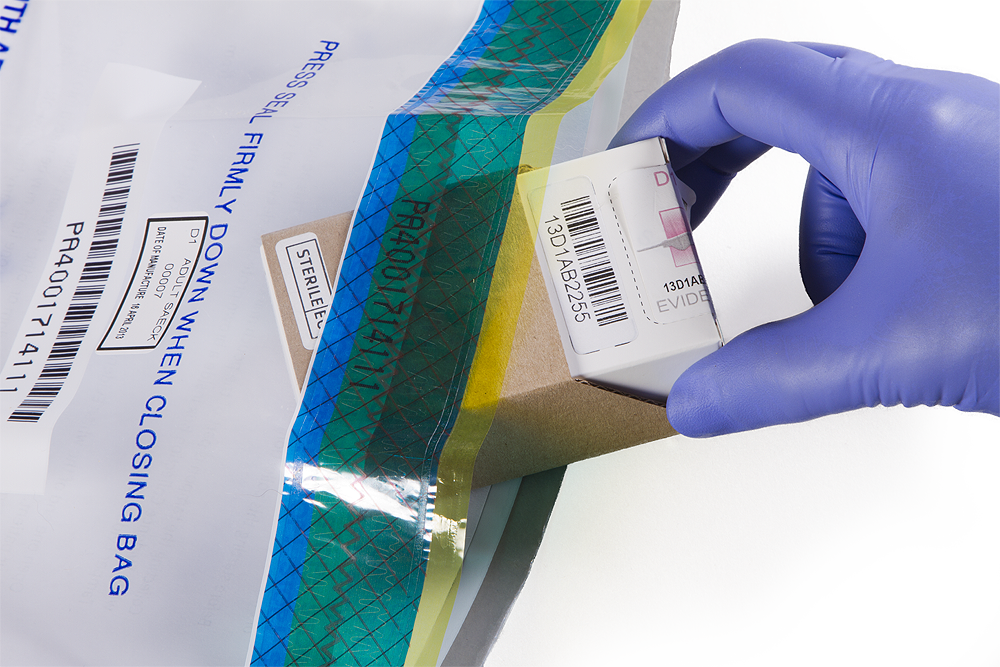
Place the sealed Evidence Collection Box sample into the larger of the two clear plastic Evidence Sealing Bags but don’t close the bag yet.
PROCESS 2b using Peel pouch – STEP 2 is now complete.
Discard any unwanted items from Step 2 and let your patient know that you are finished with this step.
PROCESS 3a – Female Ano-Genital Sample Collection
Before starting this collection, ensure that you are wearing a clean pair of gloves.
Open the last peel pouch STEP 1 This pouch contains three white Easi Swab Store boxes inside a brown protective sleeve. Three swab packages, each with one swab inside. A plastic water vial of sterilized water to moisten the swabs and nine self adhesive Tamper Evident Seal stickers.
The 3 swabs supplied may be used on a female patient’s:

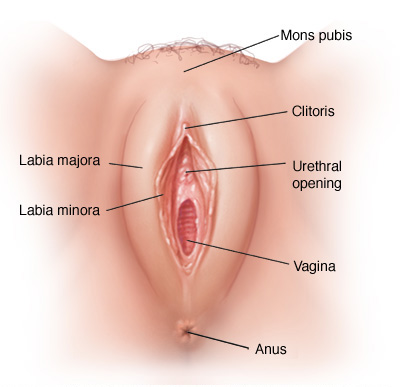
VULVA – Labia Majora, Labia Minora, Clitoral area and Fossa Navicularis
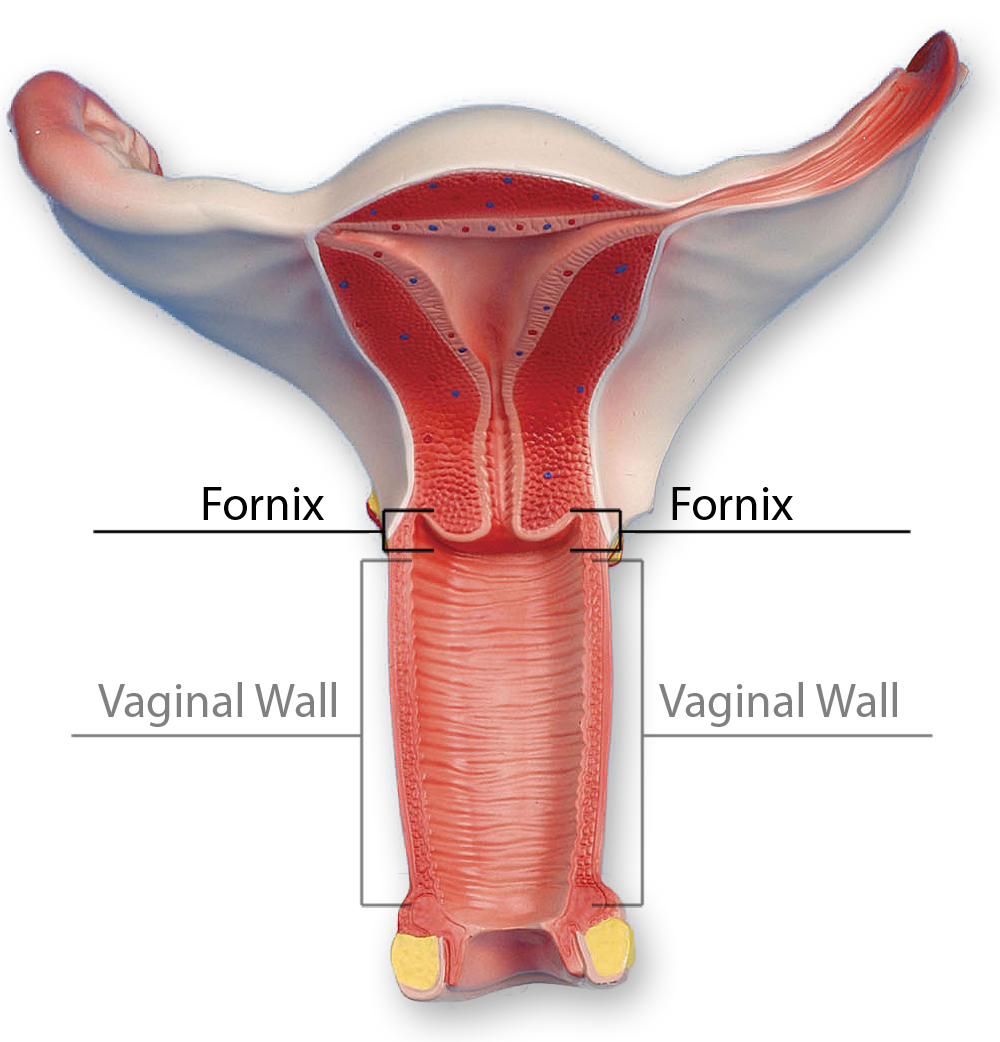
VAGINAL VAULT – (the Vagina) Vaginal wall, Fornix, Ectocervix and Cervical Os
PERIANAL – Perineum and Anal area
Collection of Vulva Sample
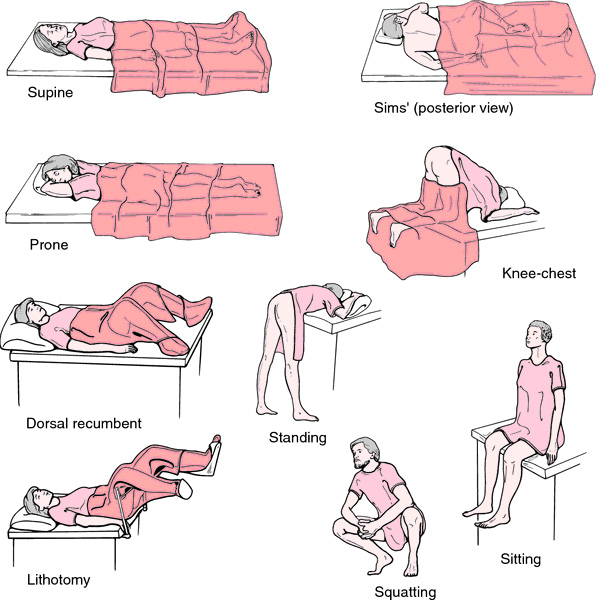
Place your patient in a suitable examination position.


Remove the swab from its protective packaging.
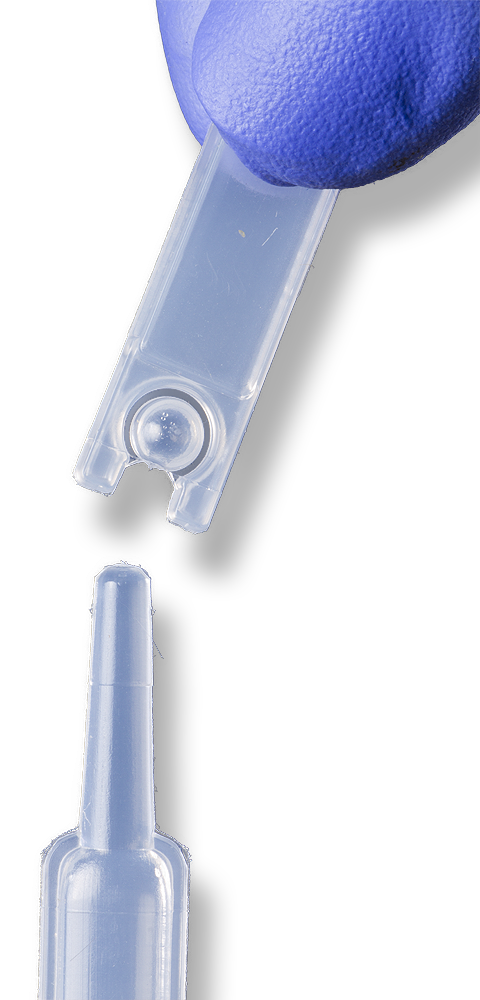
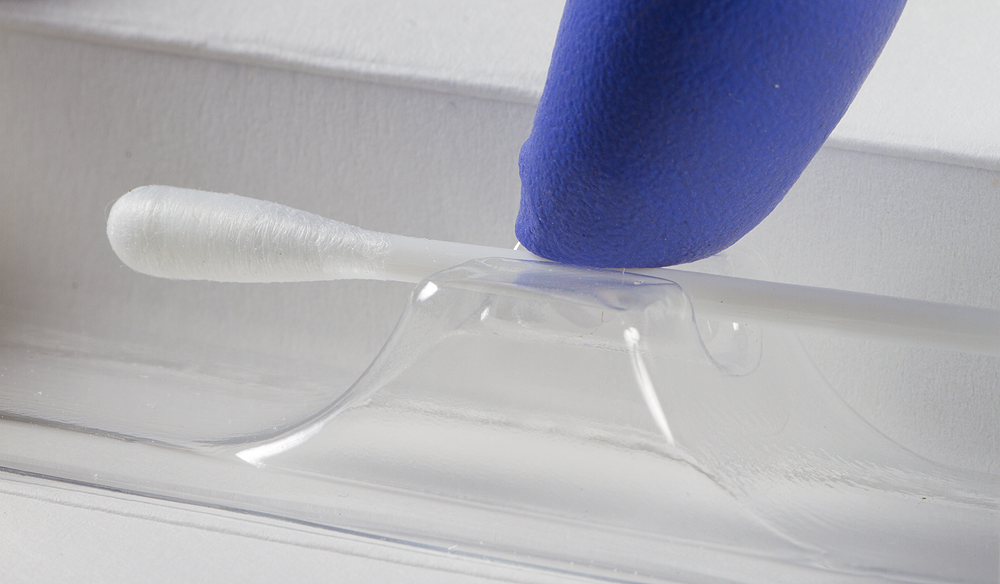
Open the water vial by twisting the cap off.
Lightly moisten the swab with 2 – 3 droplets of water. (only if the area or sample is dry)
Swab the Labia Majora
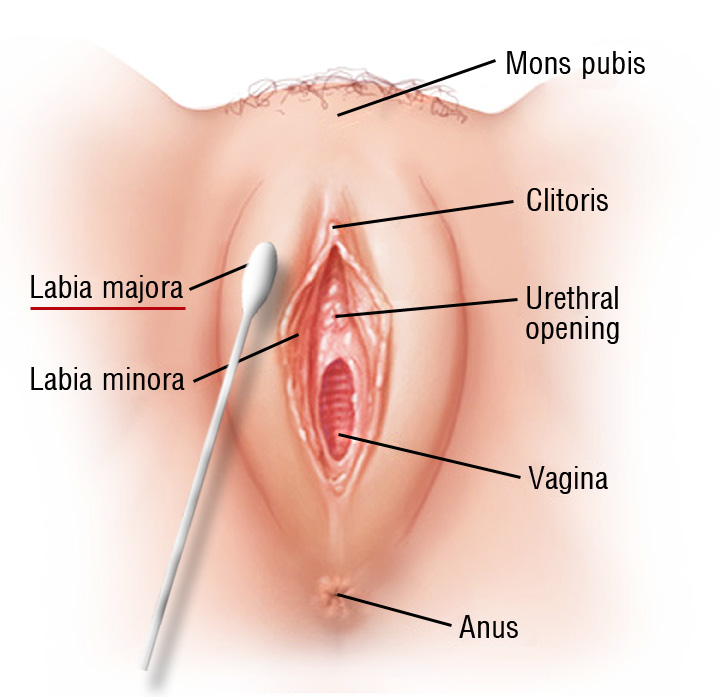
Swab the Labia Minora
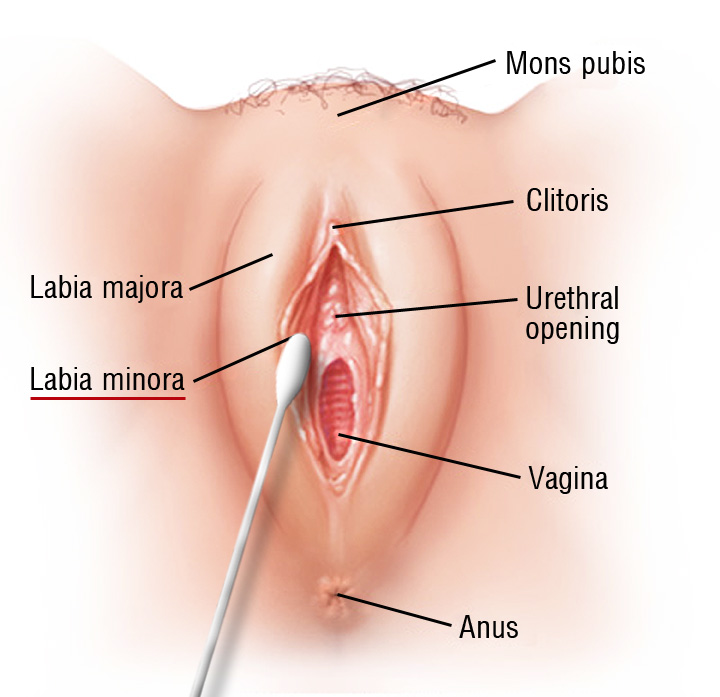
Swab the Clitoris and Clitoral Hood
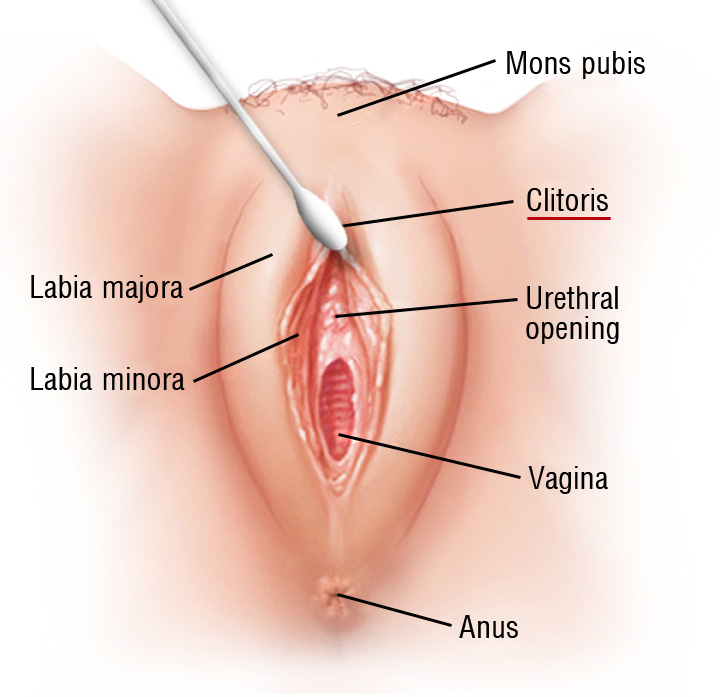

Thoroughly swab the external and internal surfaces of the labia majora, the external surface of the labia minora and clitoral hood by applying gentle pressure. Rotate the swab to ensure uniform sampling. Allow adequate time for saturation of the swab.
Open the lid of the Easi Swab Store™.
Insert the swab into the dedicated slot.
Push the swab down into the slot to secure it.
Close the lid of the Easi Swab Store™.
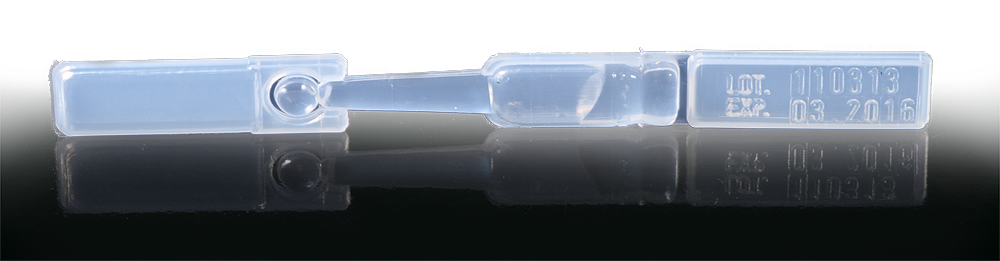
Remove the short Tamper Evident Seal from their backing liner.
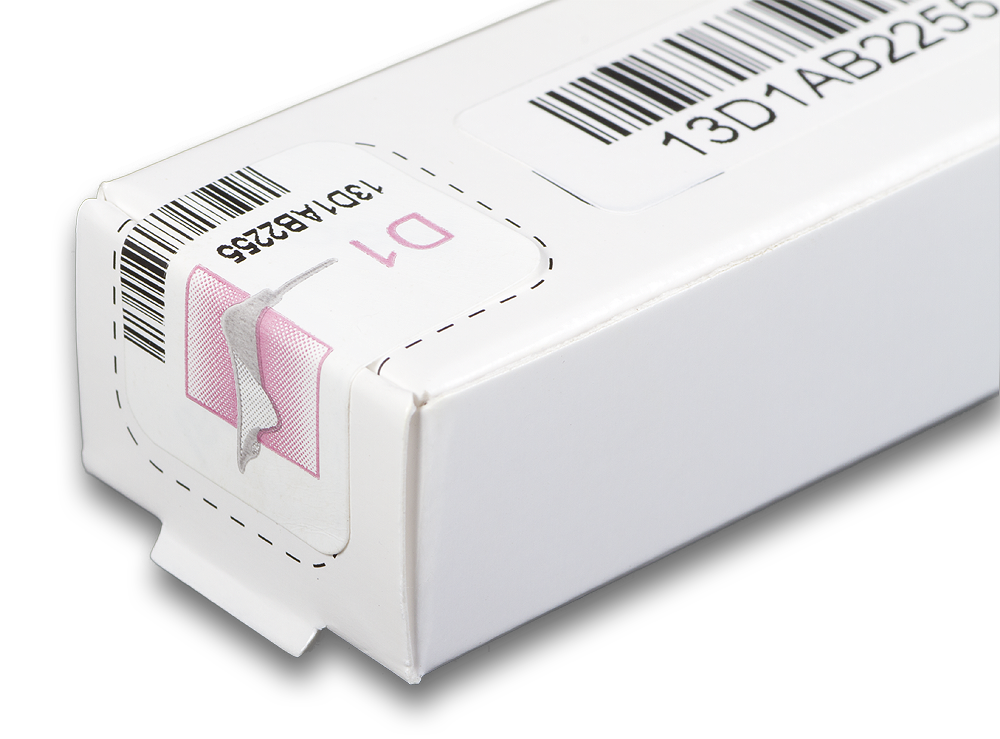
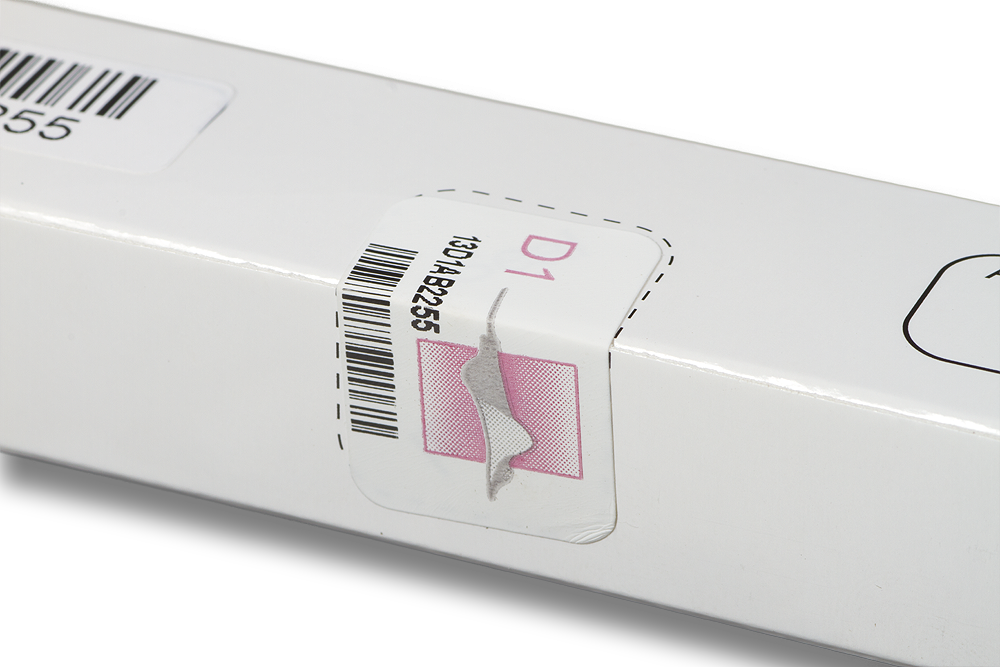
Seal the Easi Swab Store™ with the Tamper Evident Seal in 3 places where indicated.
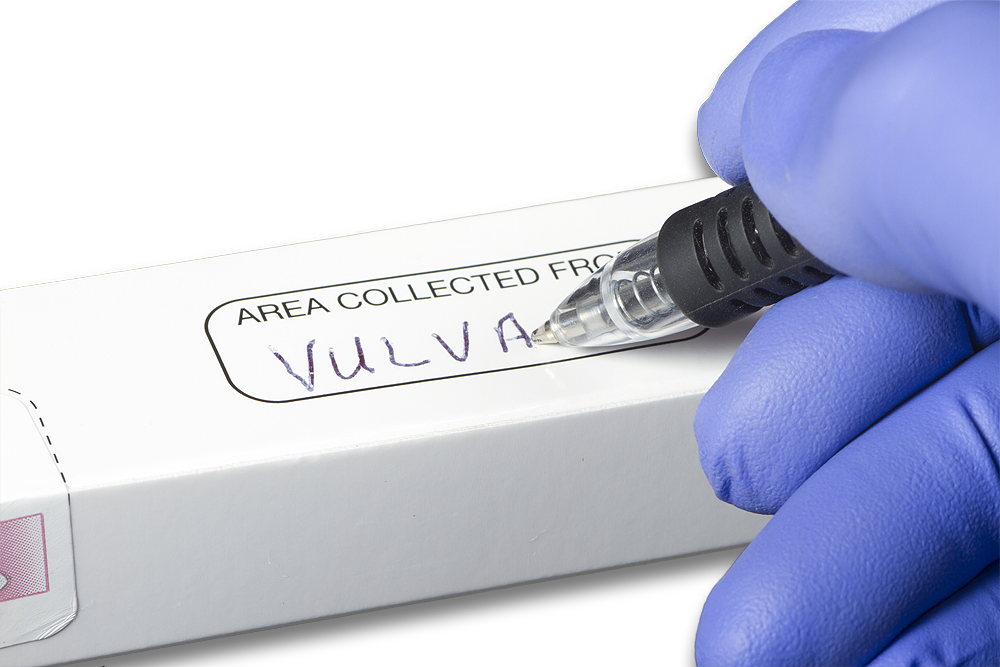
Write on the label marked AREA COLLECTED FROM Vulva
Indicate the collection of the vulva sample on the D1 documentation form. Example: Vulva
Place the sealed Easi Swab Store™ back into its protective sleeve.
Indicate the collection of the valva sample on the D1 documentation form.
Collection of a Vaginal Vault Sample
Before starting this collection, ensure that you are wearing a clean pair of gloves.
Place your patient in a suitable examination position.
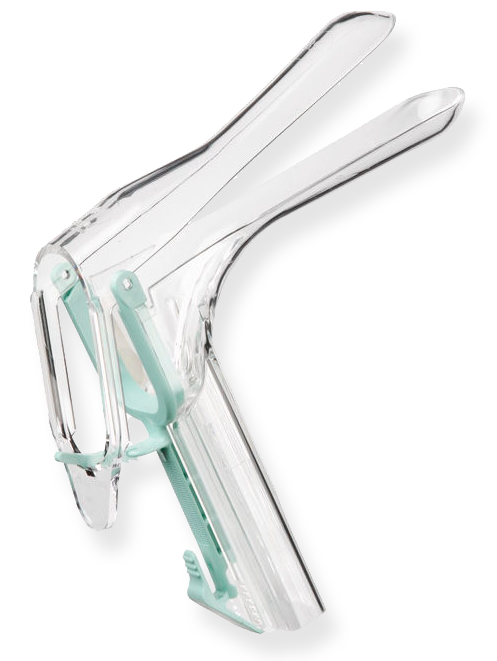
Insert a speculum to allow access to the vaginal vault
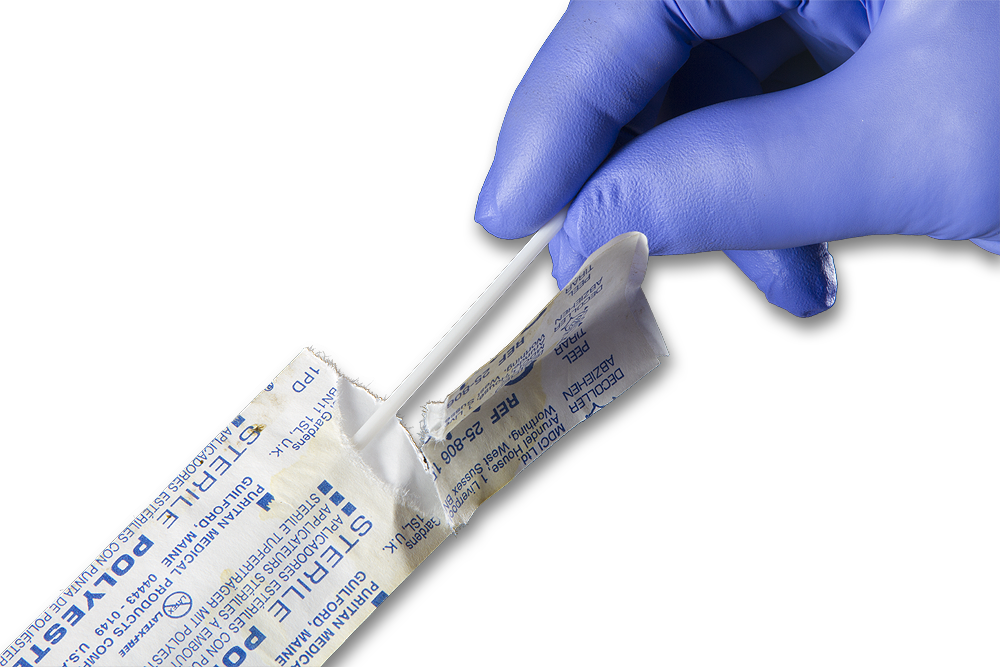
Remove the swab from its protective packaging.

The internal Vaginal Vault is usually moist, so you may not need to moisten the swab with the water vial.
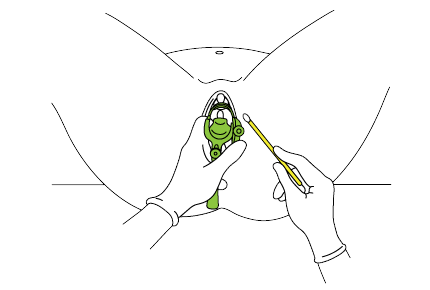
Insert the dry swab through the inserted speculum.
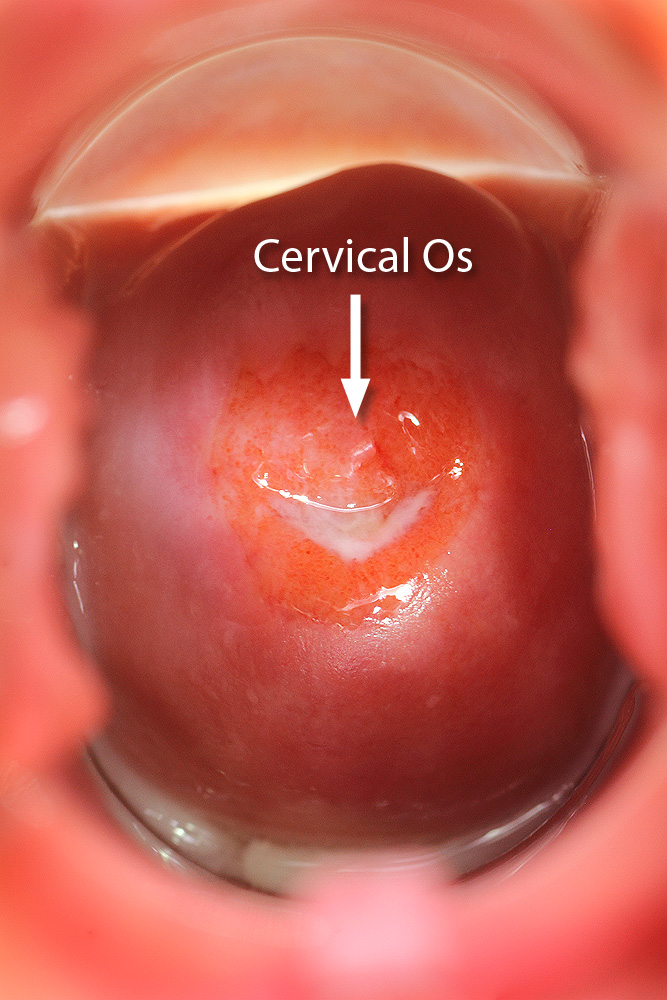
When beginning the swabbing of the internal area, it is suggested that you begin with the Cervical OS and work your way outwards to the Vaginal Wall
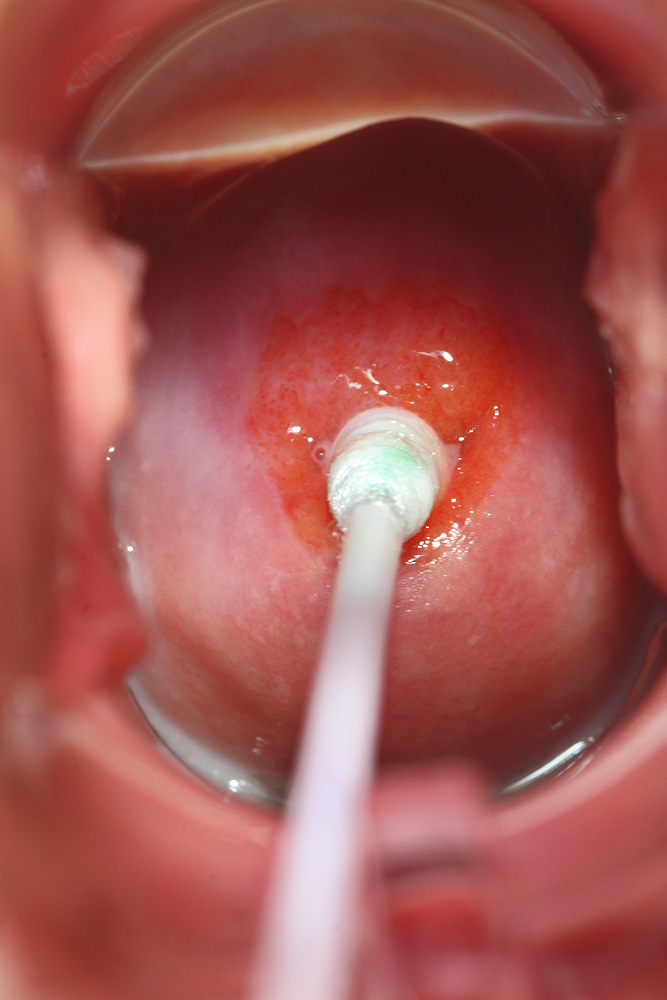
Swab inside the Cervical Os
Enter about 2 cm into the Os while gently rotating the swab.
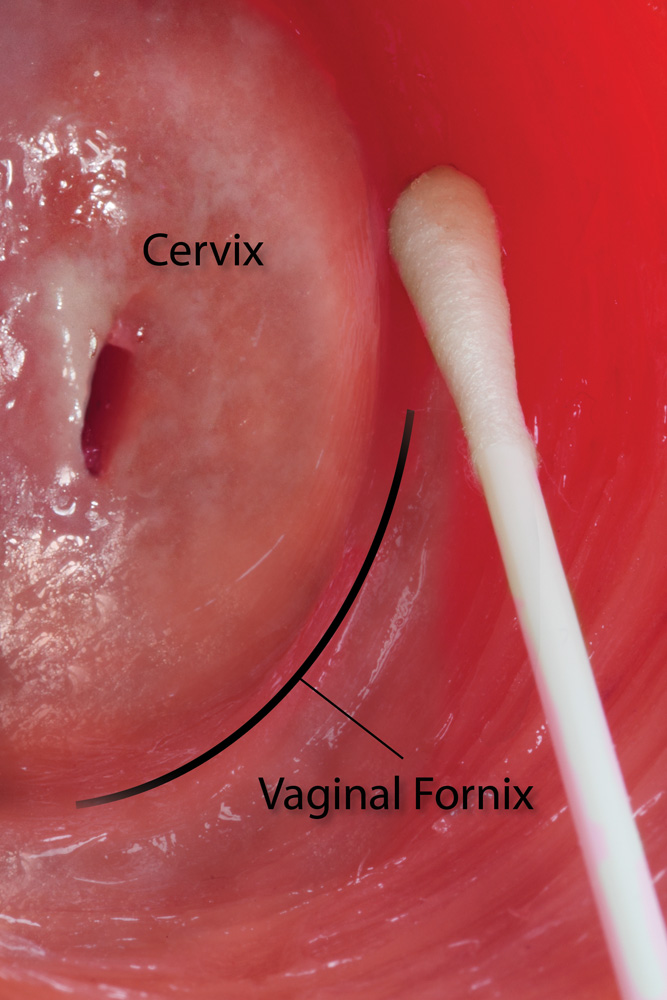
With the same swab move from the Cervical Os onto the Vaginal Fornix
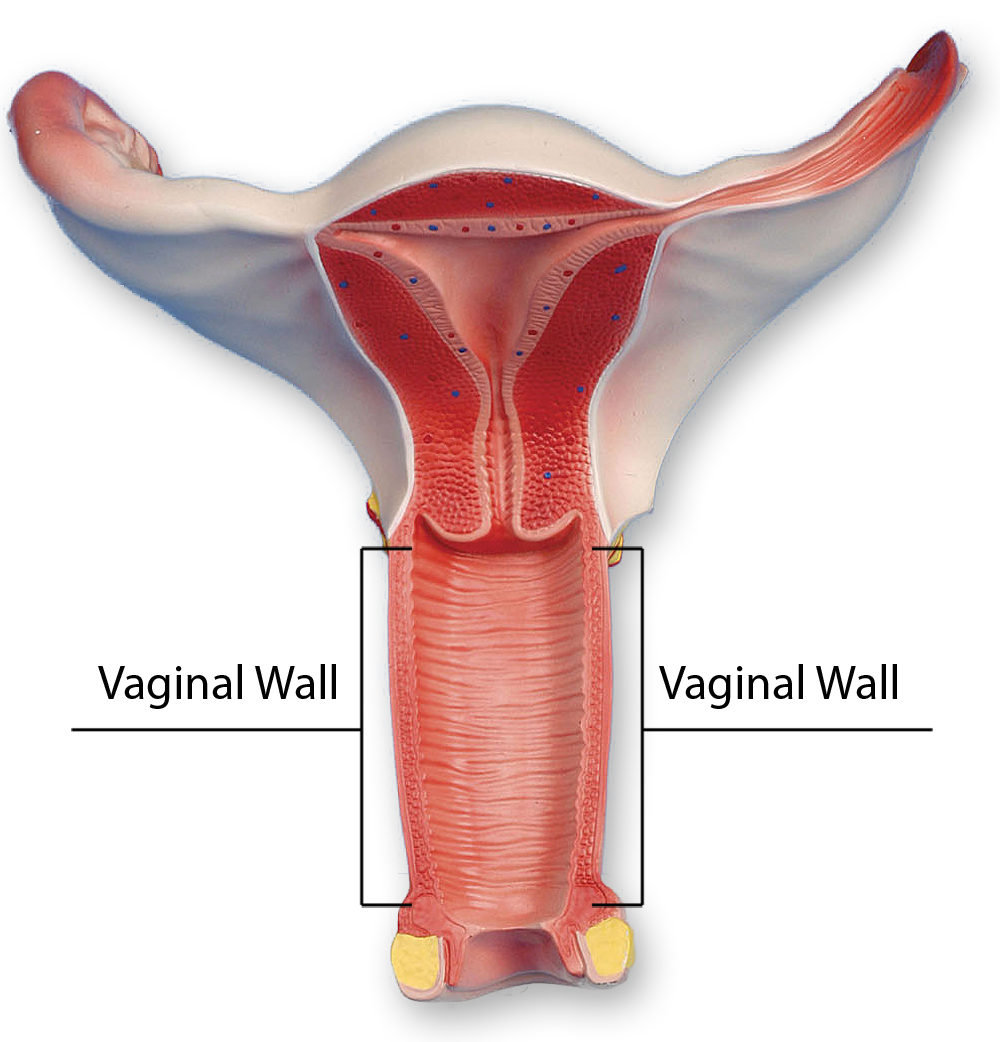
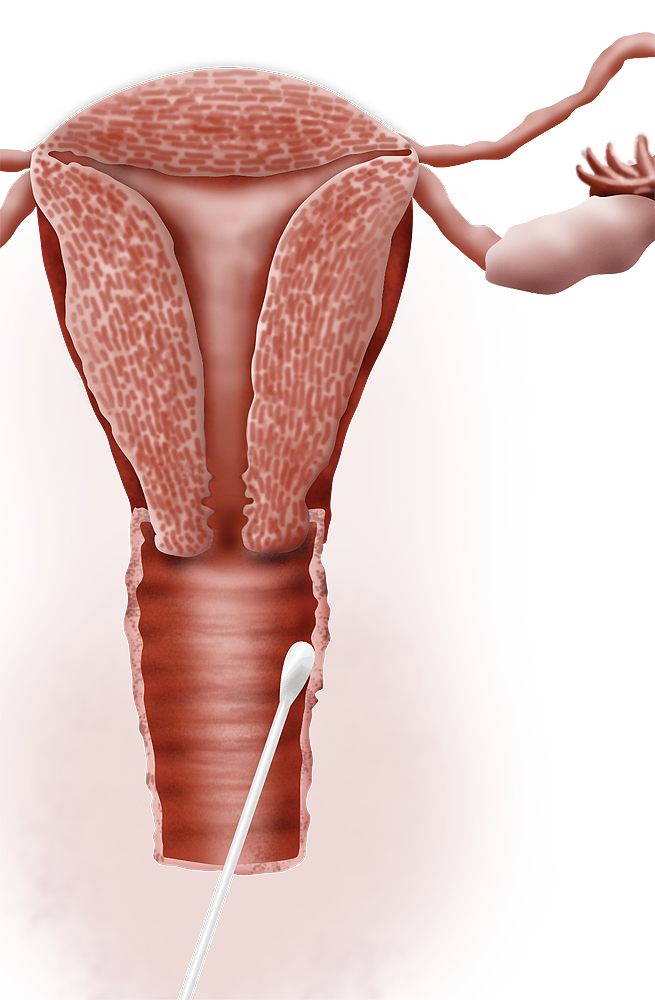
While applying gentle pressure, swab the Vaginal wall in one continuous motion.
Remove the collected swab through the speculum
Remove the Easi Swab Store™ from the brown protective sleeve.
Open the lid of the Easi Swab Store™.
Insert the swab into the dedicated slot.
Push the swab down into the slot to secure it.
Close the lid of the Easi Swab Store™.
Remove three of the short Tamper Evident Seals.
Remove the seals from its backing liner.
Seal the Easi Swab Store™ in three places with the Tamper Evident Seals where indicated.

Write on the label marked AREA COLLECTED FROM Vaginal Vault
Place the sealed Easi Swab Store™ back into its protective sleeve.
Indicate the collection of the Vaginal Vault sample on the D1 documentation form.
Collection of a Peri-Anal Sample
Before starting this collection, ensure that you are wearing a clean pair of gloves.
Place your patient in a suitable examination position.
Remove the swab from its protective packaging.
Open the water vial.
Lightly moisten the swab with 2 – 3 droplets of water.
Swab the Anus Area
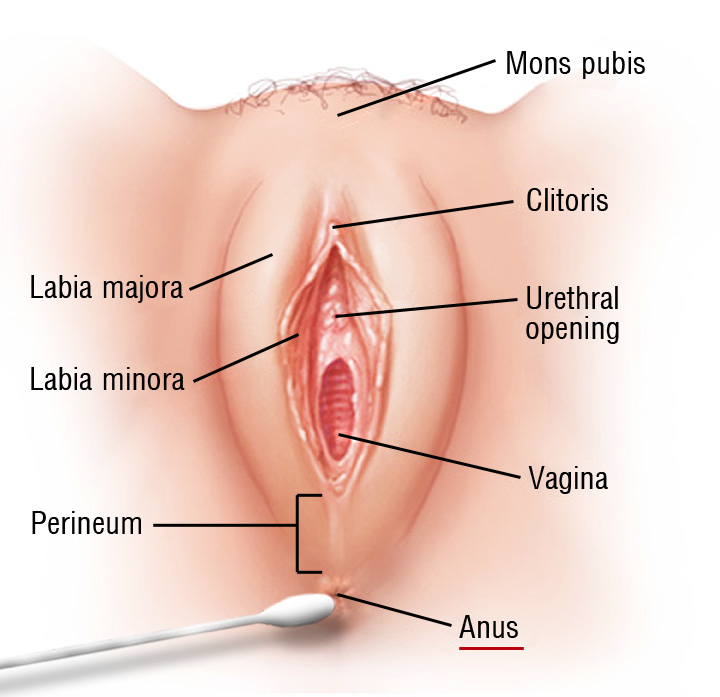
Swab the Perineum
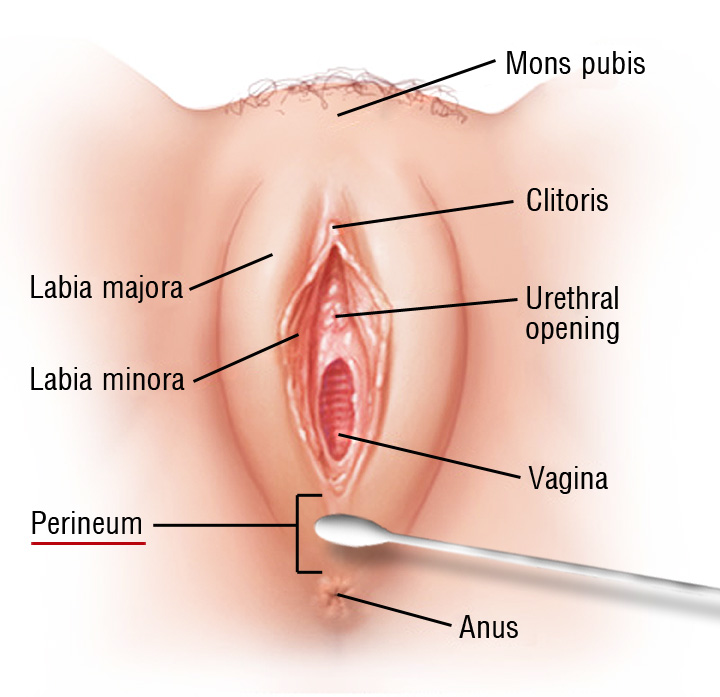
While applying gentle pressure, thoroughly swab the perineum and anal area. Rotate the swab to ensure that all areas of the swab head come into contact with the surface being swabbed. Allow adequate time for saturation of the swab.
A sterile Ano-scope may be used.
Remove the last Easi Swab Store™ from the brown protective sleeve.
Open the lid of the Easi Swab Store™.
Insert the swab into the dedicated slots.
Push the swab down into the slots to secure it.
Close the lid of the Easi Swab Store™.
Remove three of the short Tamper Evident Seals.
Remove the seals from its backing liner.
Seal the Easi Swab Store™ in three places with the Tamper Evident Seals where indicated.
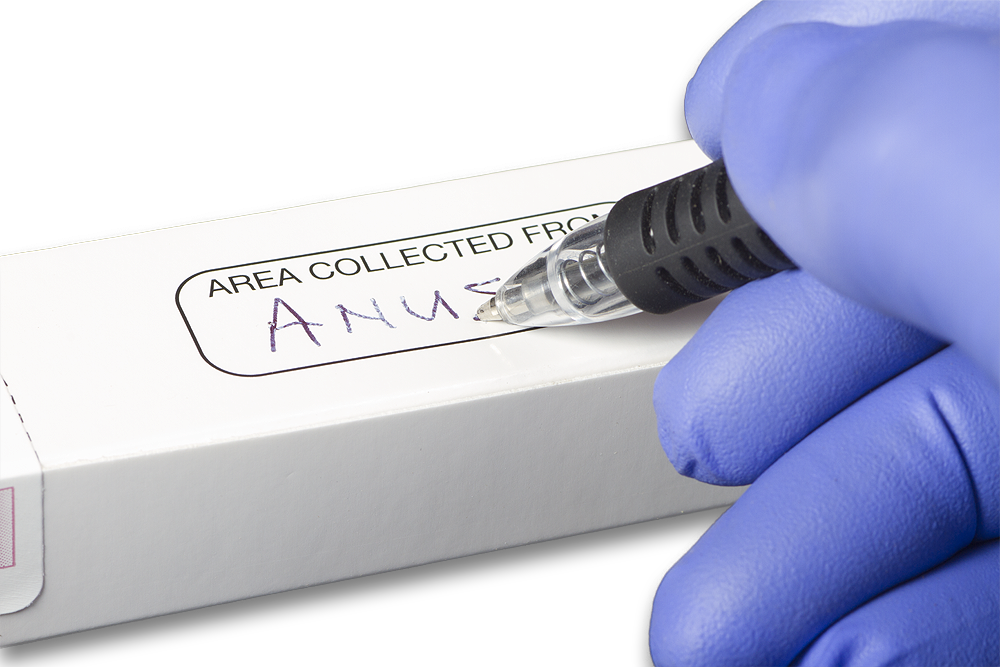
Write on the label marked AREA COLLECTED FROM Peri-anal or Anus
Place the sealed Easi Swab Store™ back into its protective sleeve.
Indicate the collection of the Peri-anal sample on the D1 documentation form.
Place the box with the three Easi Swab Stores™ into the large plastic Evidence Sealing Bag.
Check that you have completed the documentation form.
Place the Top Copy of the completed form into the plastic Evidence Sealing Bag.
Place three desiccants into the plastic Evidence Sealing Bag.
Although you are now finished with the examination.
Do not seal the Evidence Sealing Bag just yet.
Let your patient know that you are finished with this Evidence Collection.
You now need to seal the collected samples, move down to PROCESS 4.
PROCESS 3b – Male Ano-Genital Sample Collection
 For the male patient, the presence of saliva on the penis could indicate that oral-genital contact was made; the presence of vaginal secretions could help corroborate that the penis was introduced into a vaginal orifice; and faeces or lubricants might be found if rectal penetration occurred.
Before starting this collection, ensure that you are wearing a clean pair of gloves.
Open the last peel pouch STEP 1 This pouch contains three white Easi Swab Stores™ inside a brown cardboard protective sleeve. Three swab packages, each with one swab inside. A plastic water vial of sterilized water to moisten the swabs and nine self adhesive Tamper Evident Seals.
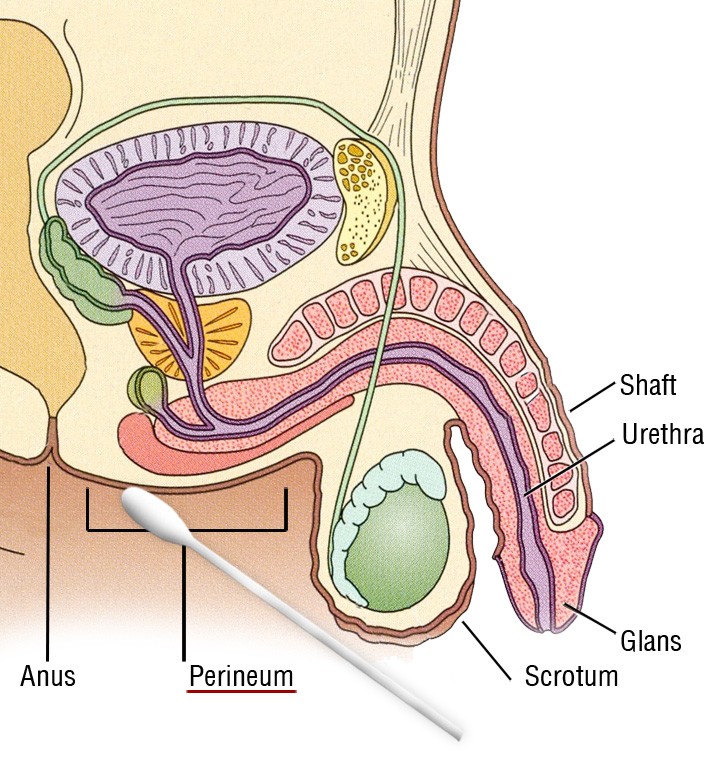
The 3 swabs supplied may be used on a male patient’s:
SCROTUM
SHAFT GLANS
PERI-ANAL
Collection of a Scrotum Sample
Before starting this collection, ensure that you are wearing a clean pair of gloves.
Place your patient in a suitable examination position for access to the scrotum.
Remove the swab from its protective packaging.
Open the water vial.
Lightly moisten the swab with 2 – 3 droplets of water. (only if the area or sample is dry)
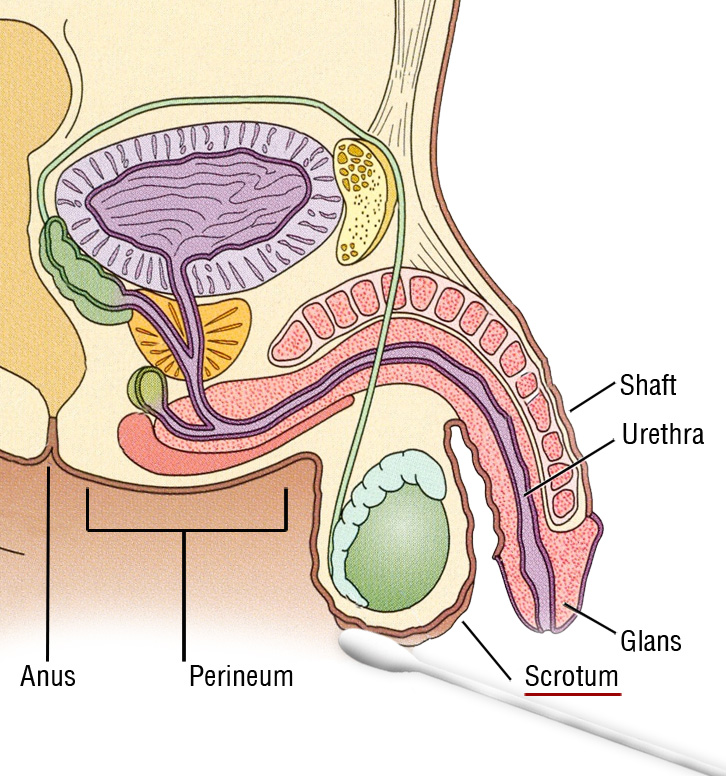
Swab the scrotal area, focusing on the area that is in closest proximity to the penis, with a rotating motion to ensure uniform sampling.
Remove the Easi Swab Store™ from the brown cardboard protective sleeve.
Open the lid of the Easi Swab Store™.
Insert the swab into the dedicated slots.
Push the swab down into the slots to secure it.
Close the lid of the Easi Swab Store™.
Remove three of the short Tamper Evident Seals.
Remove the seal from their backing liner.
Seal the Easi Swab Store™ with the Tamper Evident Seals where indicated.
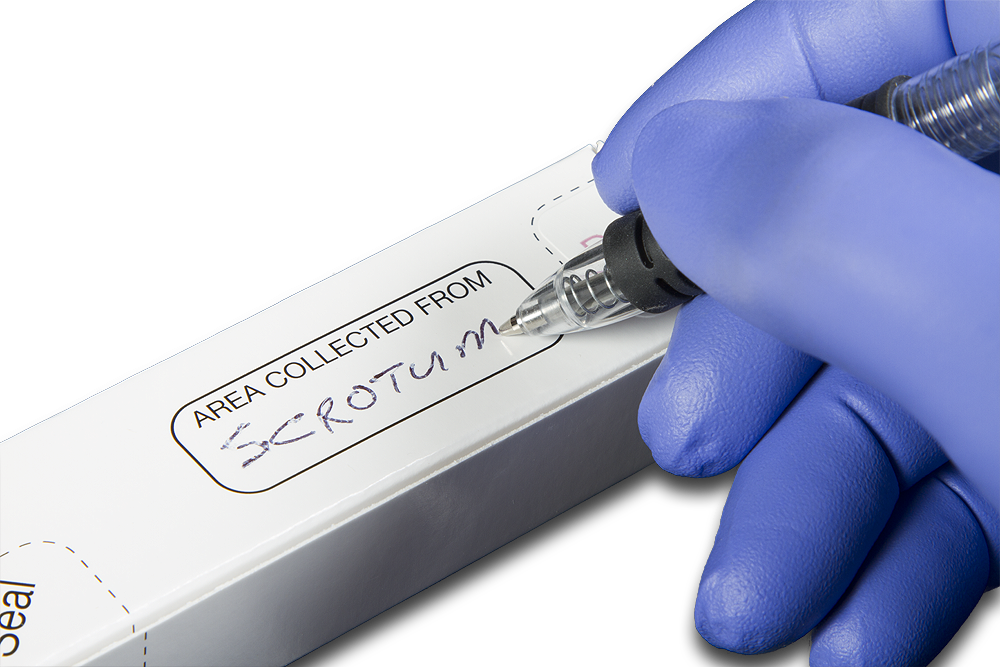

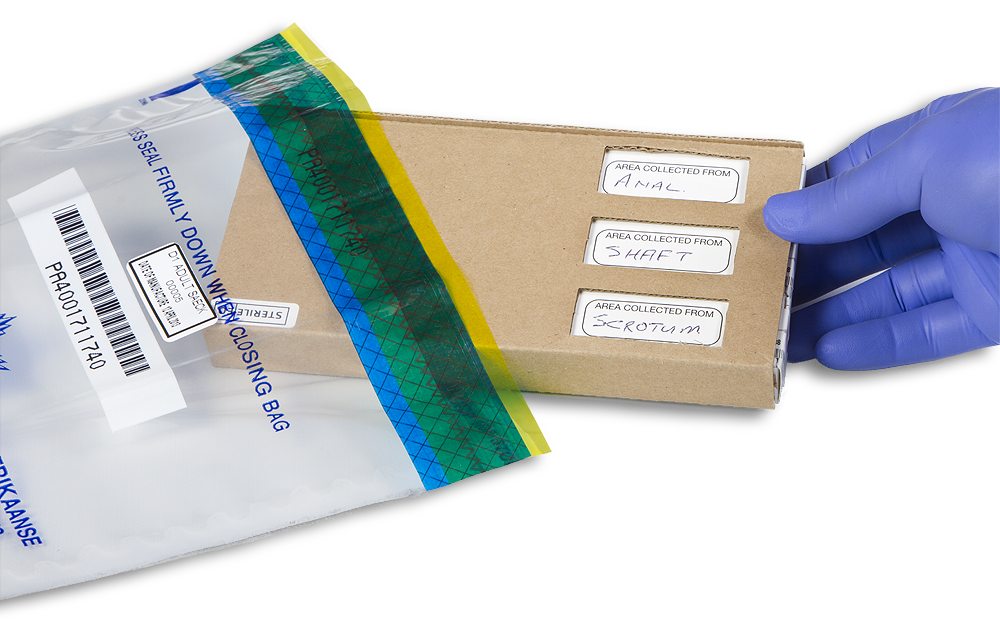
Write on the label marked AREA COLLECTED FROM Scrotum
Place the sealed Easi Swab Store™ back into its protective sleeve.
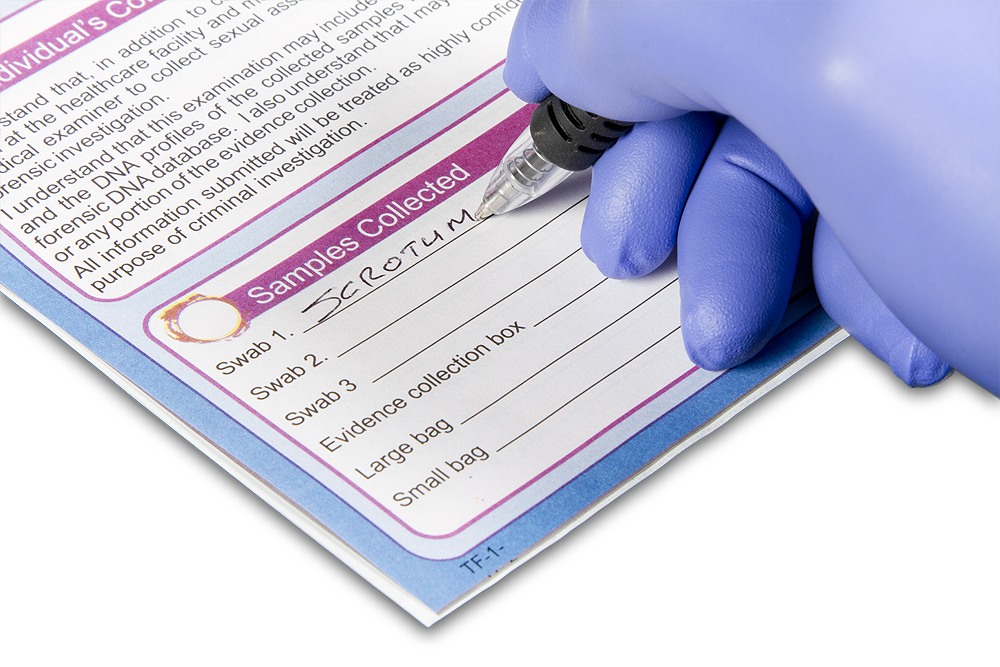
Indicate the collection of the Scrotum sample on the D1 documentation form . Example: Scrotum
Collection of a Shaft / Glans Sample
Before starting this collection, ensure that you are wearing a clean pair of gloves.
Place your patient in a suitable examination position for access to the penis shaft.
Remove the swab from its protective packaging.
If the Glans section of the penis is dry, you may need to moisten the swab from the water vial.
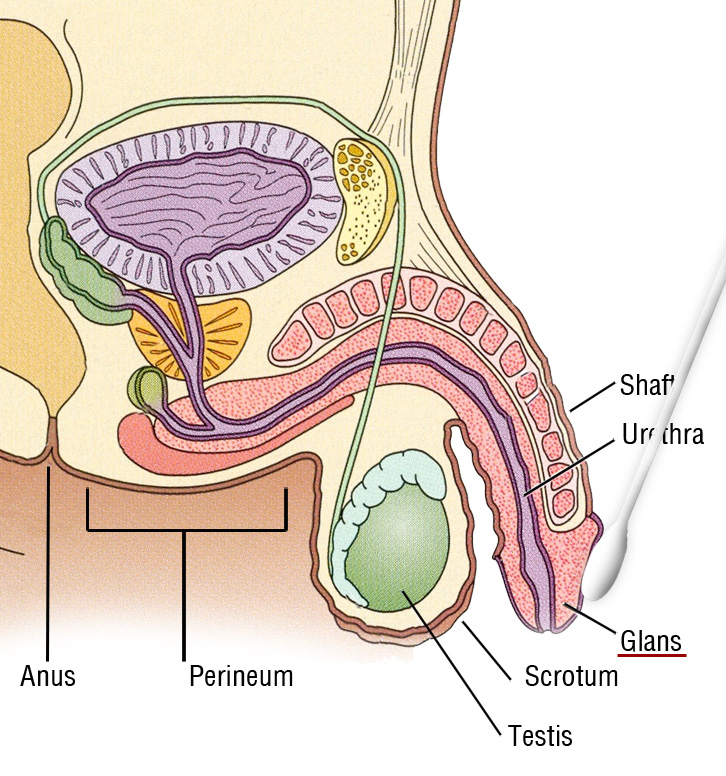
Swab the penile shaft and base of the penis with a rotating motion, then continue to swab the glans and move under the foreskin around the frenulum with a rotating motion, to ensure uniform sampling.
Remove the Easi Swab Store™ from the brown cardboard protective sleeve.
Open the lid of the Easi Swab Store™.
Insert the swab into the dedicated slots.
Push the swab down into the slots to secure it.
Close the lid of the Easi Swab Store™.
Remove three of the short Tamper Evident Seals.
Remove the seals from its backing liner.
Seal the Easi Swab Store™ in three places with the Tamper Evident Seals where indicated.
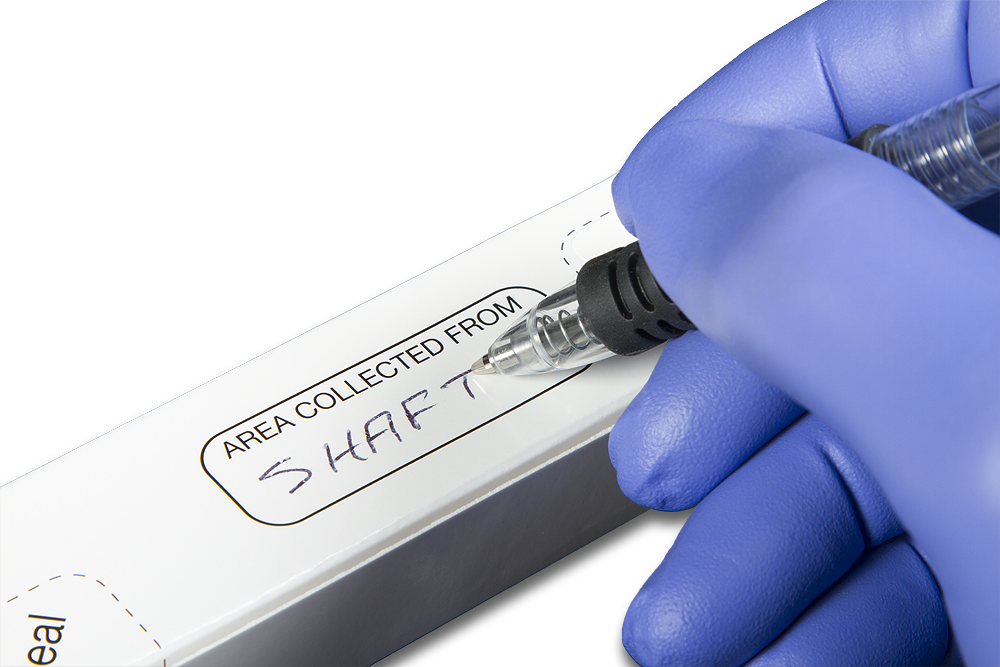
Write on the label marked AREA COLLECTED FROM Shaft / Glans
Place the sealed Easi Swab Store™ back into its protective sleeve.
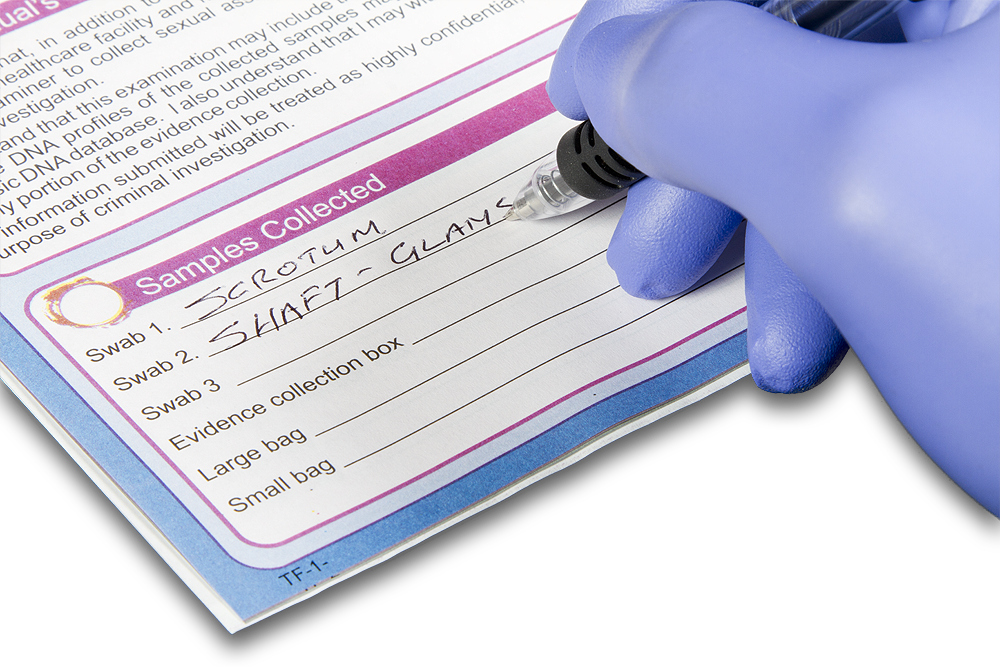
Indicate the collection of the shaft and glans sample on the D1 documentation form.
Collection of a Peri-Anal Sample
Before starting this collection, ensure that you are wearing a clean pair of gloves.
Place your patient in a suitable examination position to access the peri-anal area.
Remove the swab from its protective packaging.
Open the water vial.
Lightly moisten the swab with 2 – 3 droplets of water.
While applying gentle pressure, thoroughly swab the perineum and anal area. Rotate the swab to ensure that all areas of the swab head come into contact with the surface being swabbed.
Allow adequate time for saturation of the swab.
Remove the last Easi Swab Store™ from the brown cardboard protective sleeve.
Open the lid of the Easi Swab Store™.
Insert the swab into the dedicated slots.
Push the swab down into the slots to secure it.
Close the lid of the Easi Swab Store™.
Remove three of the short Tamper Evident Seals.
Remove the seals from its backing liner.
Seal the Easi Swab Store™ in three places with the Tamper Evident Seals where indicated.
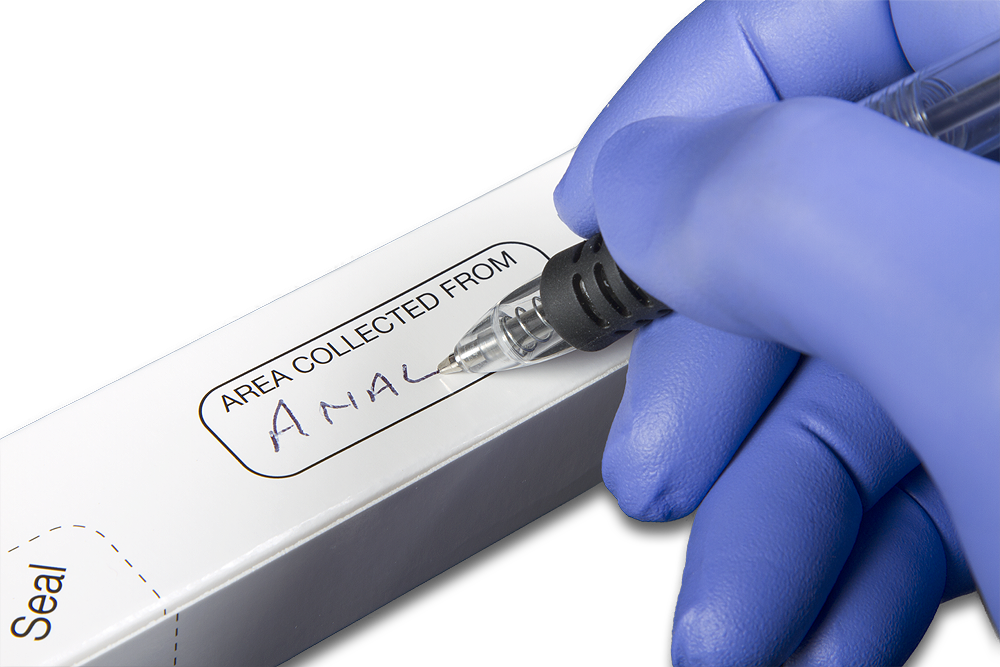
Write on the label marked AREA COLLECTED FROM Peri-anal
Place the sealed Easi Swab Store™ back into its protective sleeve.
Indicate the collection of the Peri-anal sample on the D1 documentation form.
Place the protective sleeve containing the three Easi Swab Stores™ into the large plastic Evidence Sealing Bag.
Check that you have completed the documentation form.
Place three desiccants into the plastic Evidence Sealing Bag.
Place the Top Copy of the completed form into the plastic Evidence Sealing Bag.
Do not seal the Evidence Sealing bag just yet, first read PROCESS 4.
Let your patient know that you are finished with this Evidence Collection.
You now need to seal the collected samples, move down to PROCESS 4.
PROCESS 4 – Sealing the Evidence for Collection
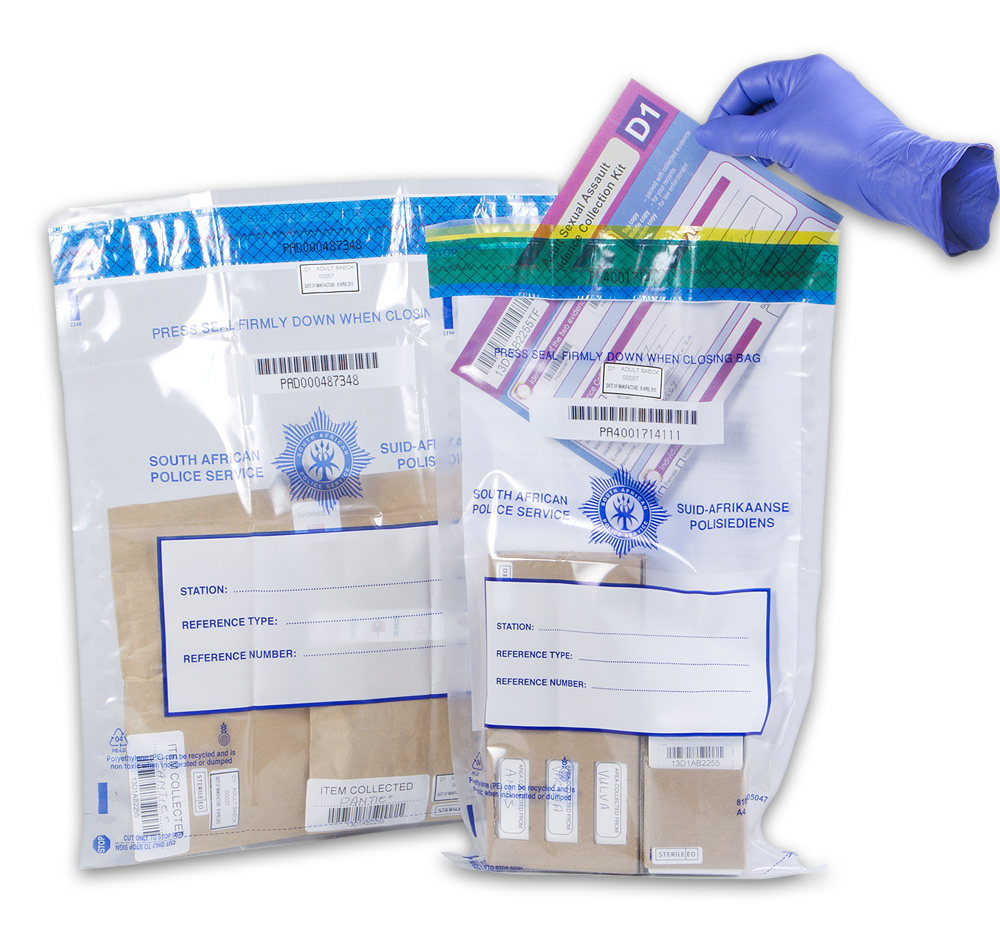
You should now have 2 plastic Evidence Sealing Bags containing the content of your evidence collection with one bag unsealed.
The larger Evidence Sealing Bag should now contain: and is Sealed
1 Large paper bag with patient’s panties – Sealed
If used, 1 smaller paper bag with a sanitary pad – Sealed
3 loose desiccants.
The smaller Evidence Sealing Bag should now contain: Still Open
If required, 1 Evidence Collection Box containing a tampon or condom.
A brown protective sleeve containing 3 Easi Swab Stores™– Sealed
3 loose desiccants.
Insert the top copy of the completed and signed information form
Insert the top copy of the J88 form
If all the above is correct you may now seal the Evidence Collection Bag.
Both bags seal with the same method
Seal the Evidence Sealing Bag by peeling away the yellow backing tape. Start peeling the yellow tape from one side while pressing the sticky surface closed. Continue peeling the yellow tape and pressing closed until the bag is sealed. Apply pressure to ensure that the seal is completely sealed.
If the law enforcement officer is not available to collect immediately. This kit can now be stored in a safe location.
If the law enforcement officer is available to collect.
Ask the officer to write the station name and CAS number on the case reference label that is located on the front of the Evidence Sealing Bags.
Ask the officer to sign acceptance of the two Evidence Collection Bags to Law Enforcement on your copy of the information form.
Help and Support
If you have any questions or have experienced problems with the evidence collection kit, please contact us.
You will be asked to quote the following numbers
Barcode number – Each kit works with a unique barcode number and can be found on all major items in the kit.
Lot number
The problem experienced – Please supply us with a description of what problems were experienced.
Please contact us with as much information about your query as possible.